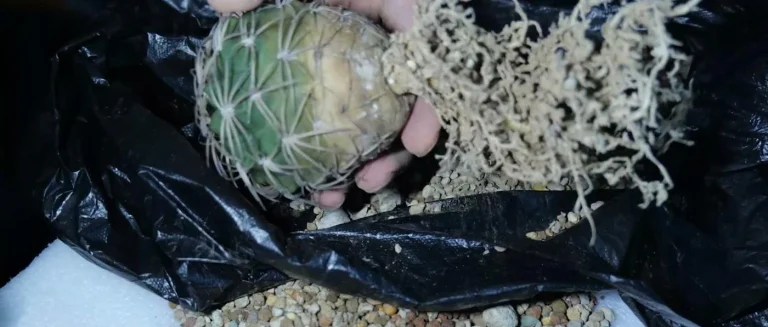
Coral Cactus Plant Care and Propagation by Cutting the Crest
Quick answer
A coral cactus plant isn’t a true cactus at all: it’s a crested spurge, Euphorbia lactea ‘Cristata’, whose wavy fan is usually grafted onto the upright stem of another euphorbia. It wants bright light, a gritty mix that dries out fast, and far less water than its fleshy look suggests. When the stem underneath starts to rot, you can still save the crest by cutting it off with a short piece of stem, treating and drying the cut, and potting it on its own, which is also how one plant turns into several. Below I go through what the plant is, how I keep it healthy, and the full rescue, step by step.
What a Coral Cactus Plant Actually Is
The ruffled top of a coral cactus is a crest, a fan of tissue that grows sideways instead of up, and it’s what gives the plant its coral-reef look. Because the crest grows slowly and hates sitting in wet soil, nurseries graft it onto a sturdier euphorbia stem, the green ridged column you see underneath. So you’re really caring for two plants joined at one point, and either half can fail.
Being a euphorbia rather than a cactus matters for one practical reason: the white milky sap. It runs from any cut and can irritate skin and eyes, so keep it away from your face and away from pets and children. I learned that from a candelabra spurge years ago, and these days the gloves go on before I even pick up the knife for a coral cactus. I wrote more about the spurge family’s look-alikes in my guide to candelabra cactus, and the true cacti are covered on my cactus overview page.
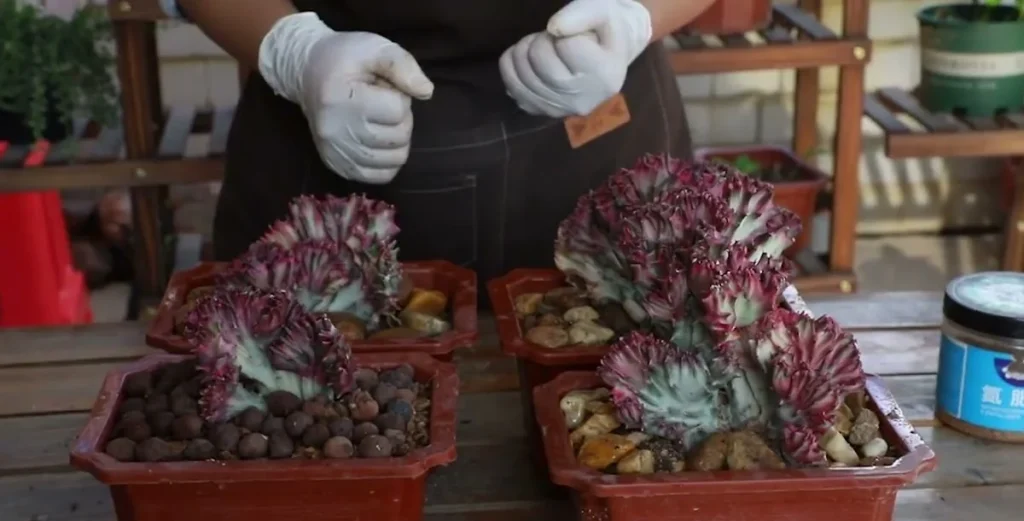
The crests in my photos are pink and gray-green, which is common in the plants sold as coral cactus. The coloring shifts with light and temperature, so don’t worry if yours looks greener. In my experience the pink deepens in cooler, brighter weather and fades a little in the humid heat of midsummer.
Coral Cactus Plant Care That Keeps the Graft Alive
A healthy graft comes down to light, drainage, and patience with the watering can. The rootstock usually fails first, and it almost always fails from staying wet.
Light and temperature for a coral cactus plant
Give it the brightest spot you have, with some gentle direct sun, and shield a newly moved plant from harsh afternoon sun until it settles. A crest kept too dark loses its coloring and eventually stretches toward the window. It has no frost tolerance, so if you put it outdoors for summer, bring it in before the nights turn cold.
Soil and watering for a coral cactus plant
I grow mine in a gritty mix with plenty of coarse granules, the same kind of fast-draining mix I use for cacti. Water deeply only when the mix is dry all the way down, then let the pot drain fully. In winter I water much less. Up on my roof, summer storms do more harm than any drought, so my coral cacti wait out the long wet spells under cover.
Does a coral cactus flower?
Crested plants rarely bloom, and the crest itself isn’t grown for flowers. If you’re hoping for flowers, my guide to flowering cactus covers the cacti that actually put on a show.
Why the Stem Under a Coral Cactus Rots
Rot usually starts in the rootstock, at or below the soil line, after weeks of soggy mix or cold, wet roots. The stem turns soft and dull, often with brownish discoloration near the base, and when you cut into it the inside is mushy instead of firm and pale green. By the time the crest looks sick, the rot underneath has often been at work for a while.
A healthy crest, though, can live on its own once it roots. That’s the whole idea behind the rescue below: cut away everything rotten, keep the clean crest with a short stub of stem, and give it a fresh start in dry, gritty soil.
How to Propagate a Coral Cactus Plant by Cutting the Crest
You’ll need gloves, a clean, sharp blade (I use a scalpel), a bowl of clean water, a fungicide labeled for ornamental plants, a bucket of gritty potting mix, small pots, a few broken pot shards, and some pebbles for the top.
Step 1: Cut off the crest and check the stem for rot
Lay the plant on a tray and cut through the rootstock below the crest. Look at the cut face: if the inside is brown or soft, cut a little higher, and keep going until the tissue is clean and firm all the way across. On my plant the lower stem was rotten inside, so I sliced it into sections and moved up until I reached healthy green.
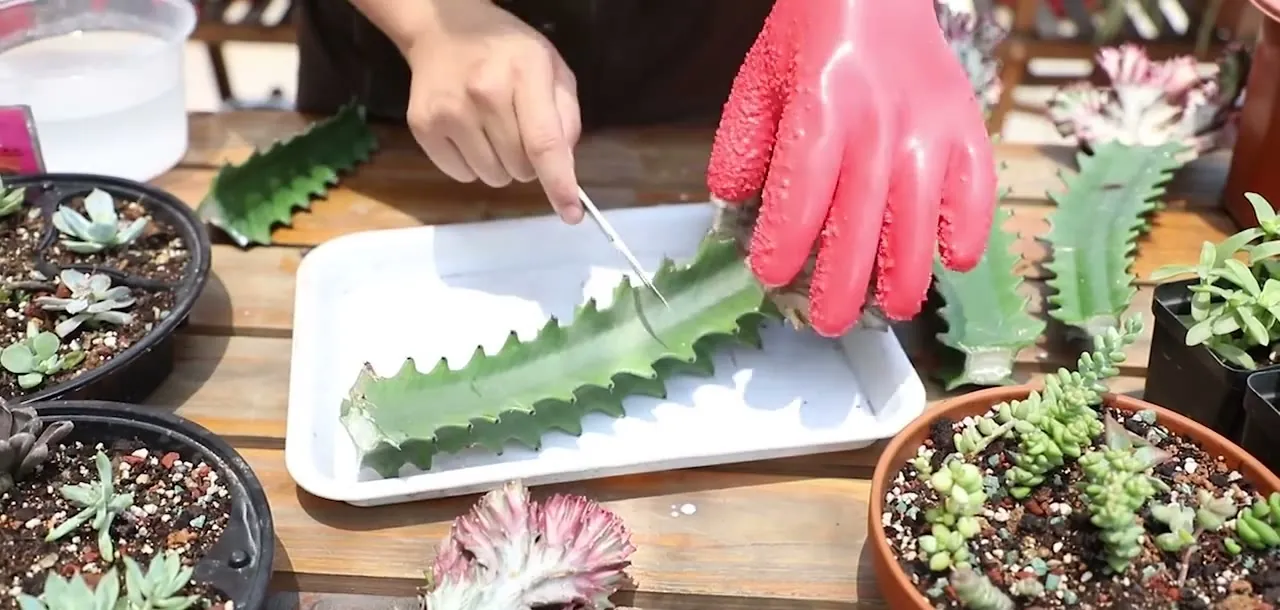
Once every cut shows clean tissue, the next job is to deal with the sap that’s already running.
Step 2: Rinse the sap and dip the cut ends in fungicide
Rinse each cut end in a bowl of clean water to wash off the milky sap, then soak the cut end in fungicide. In the US, look for a product labeled for ornamentals or houseplants and mix it at the label rate. The point is to kill anything on the fresh wound before it can start a new rot.
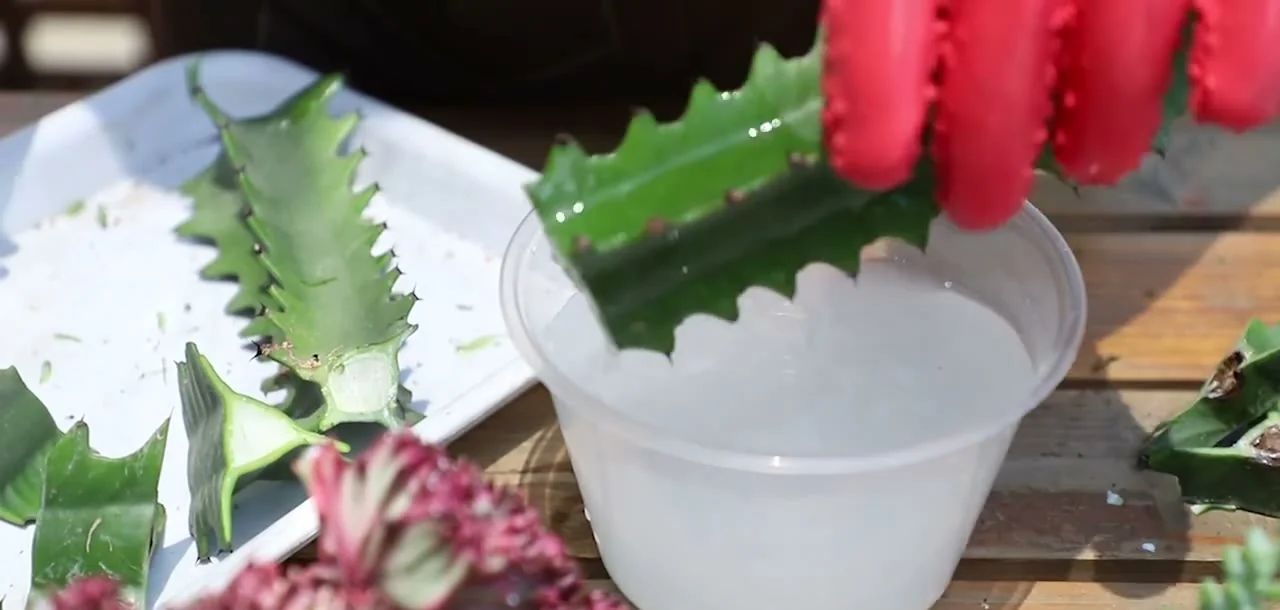
If you’d rather not use a fungicide, a dry, clean cut and a longer drying time are the minimum. In Huizhou’s damp air I don’t skip the dip.
Step 3: Dry the cuts in a shaded, airy spot
Lift the pieces out, lay them on a tray, and leave them somewhere shaded with good ventilation until the wounds are dry and sealed. A cut made with a sharp blade is smooth, so it heals cleanly, while a ragged cut leaves more surface for rot. Before planting, check that the crest still has a short piece of green stem under it.
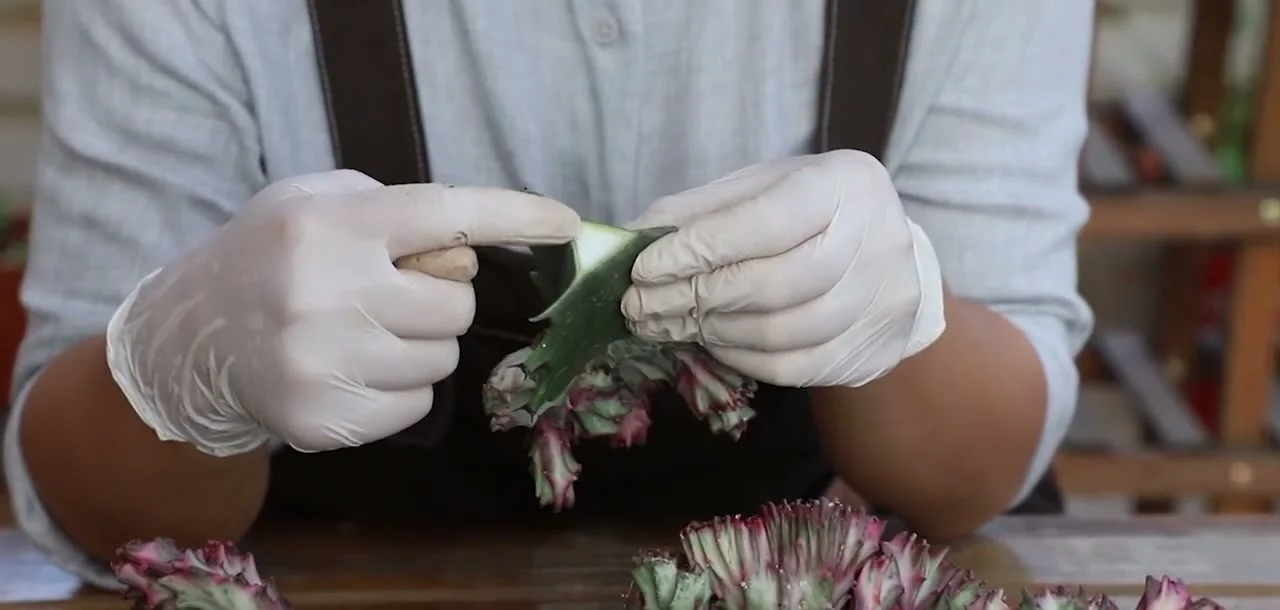
With the cuts dry, the crest is ready for its new pot.
Step 4: Mix a gritty, fast-draining potting mix
Mix ordinary potting soil with a good share of coarse granules until it feels loose and gritty in your hand. A fresh crest with no roots will rot in a mix that stays wet, so lean toward more grit rather than less.
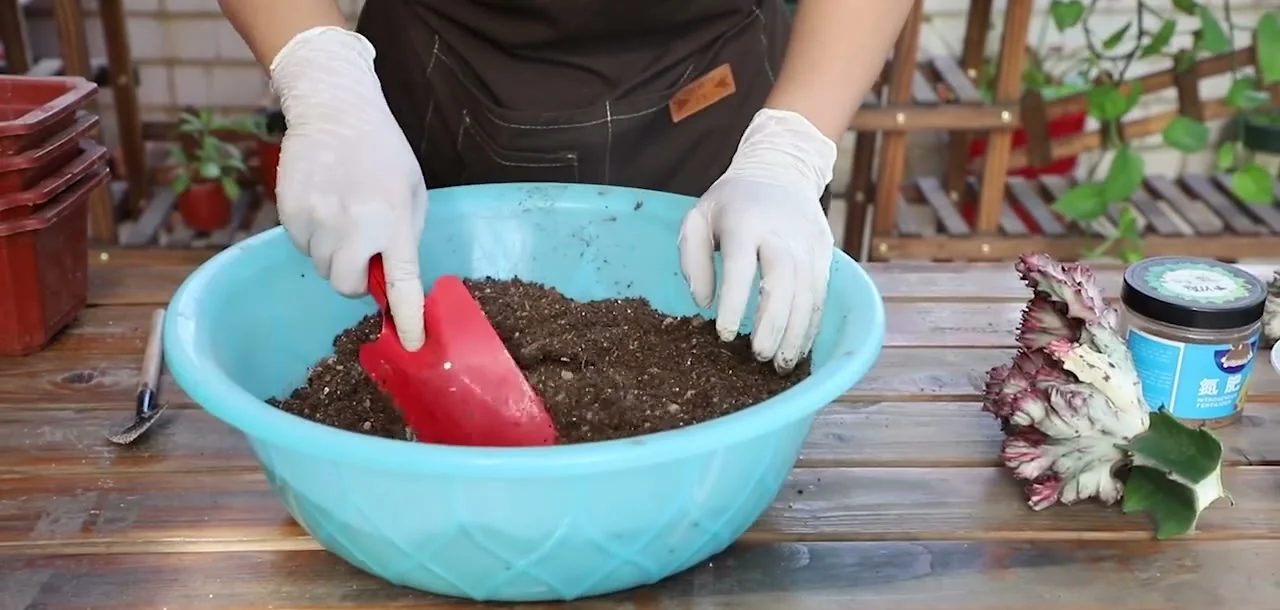
Step 5: Line the bottom of the pot with pot shards
Put a few broken pot shards in the bottom of each pot before any soil goes in. They keep the mix off the drainage hole and help water run straight through.
Step 6: Fill the pot about halfway
Add mix until the pot is about half full. That leaves room to set the crest in and pack soil around its stub.
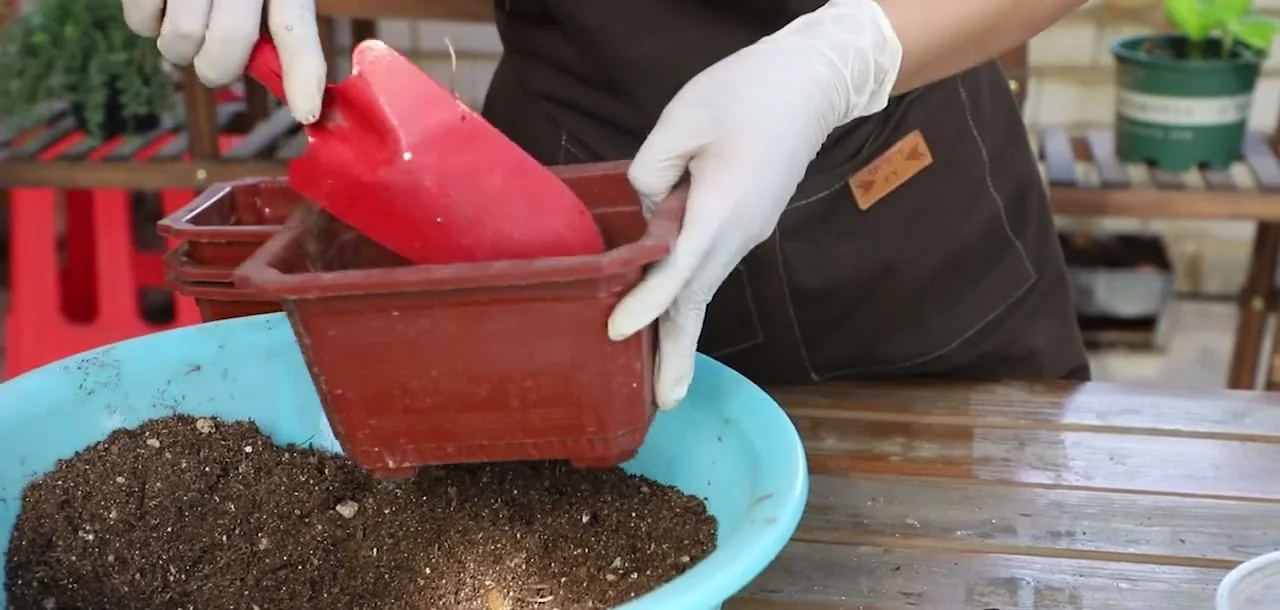
Step 7: Set the crest upright and backfill around the stem
Stand the crest in the middle of the pot with its stub in the mix, hold it straight, and add soil around the edges until it stays upright on its own. Firm the mix gently with your fingers. Don’t bury the crest itself, only the stem.
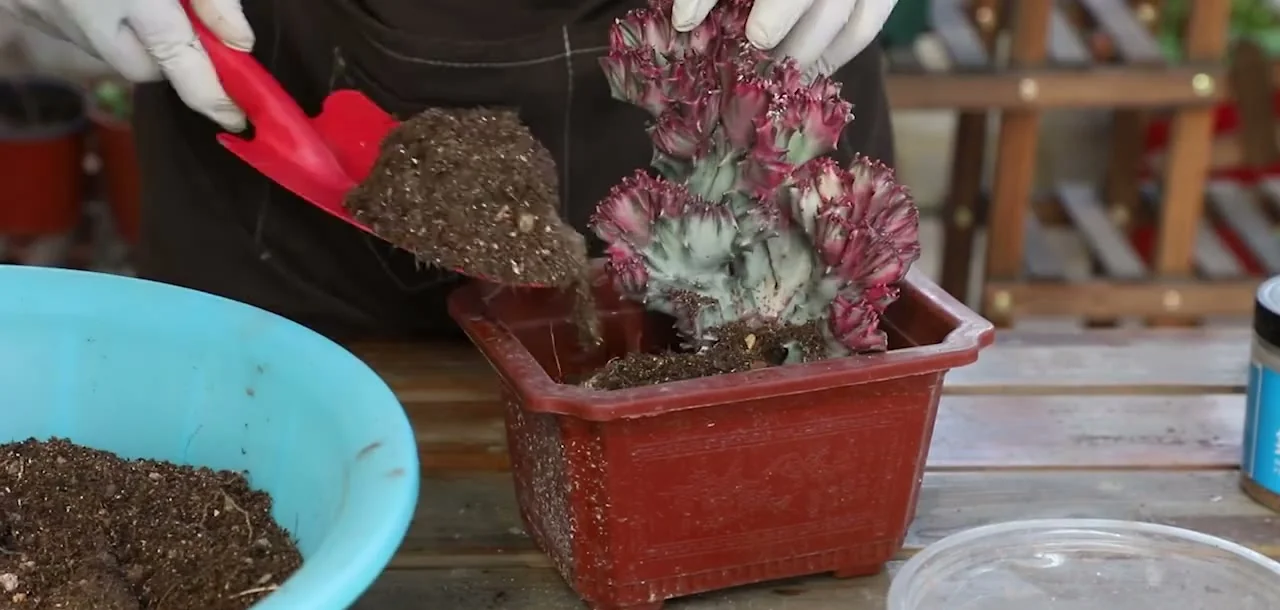
Step 8: Top the soil with pebbles
Spread a layer of small pebbles over the surface. They cut down on evaporation from the mix, and they look tidy around the base of the crest.
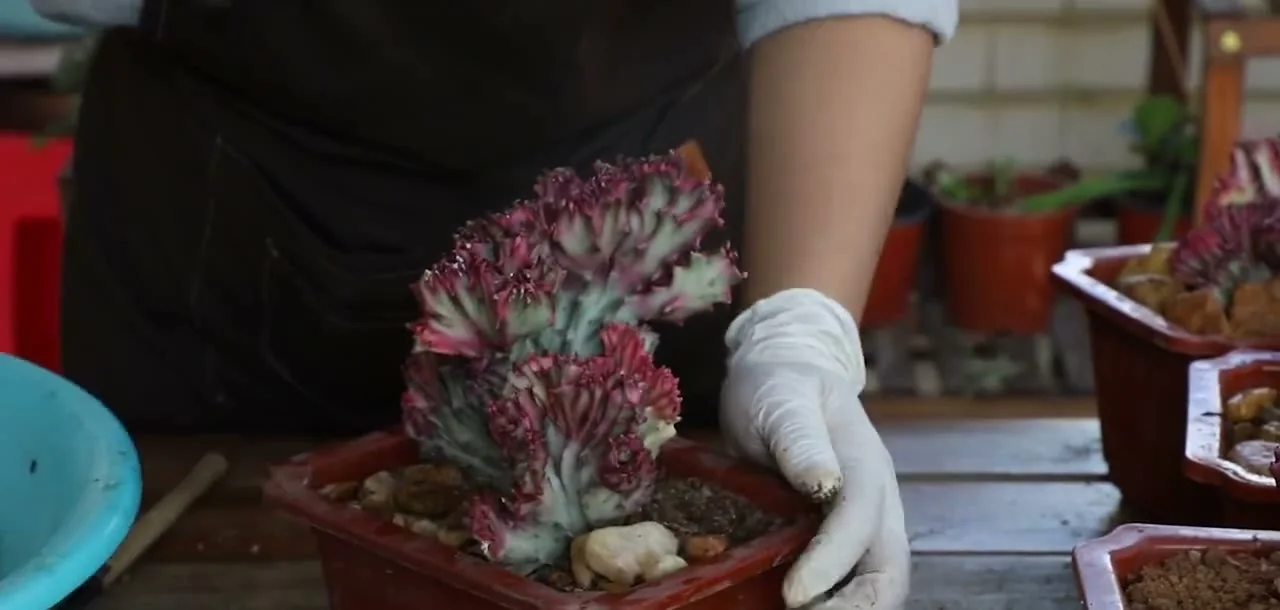
Step 9: Keep it shaded and wait five to ten days before watering
Move the potted crests to a shaded, well-ventilated spot. Don’t water right away; wait five to ten days so any small wounds can close, then give the first drink. After that, water only when the mix has dried out, and bring the plant back into brighter light bit by bit over a few weeks.
Common Mistakes When Rooting a Coral Cactus Crest
Most failed crests rot, and most rot comes from water arriving too soon. A dry crest can wait a long time for roots; a wet one won’t. The difference between a crest that roots and one that collapses usually comes down to patience in the first couple of weeks.
- Leaving brown tissue in the stem. Any soft or discolored spot left behind keeps rotting in the new pot. Cut higher until the face is clean.
- Planting before the cut is dry. A wet wound pressed into soil is an open door for rot. Let it seal first.
- Watering on day one. Give it the five to ten days, even if the mix looks dusty.
- Full sun straight after potting. A crest with no roots can’t replace lost water, so keep it in shade until it’s growing again.
- Burying the crest. Only the stub goes into the mix. The ruffled fan should sit fully above the soil.
I root most of my other column cuttings the same patient way, and the tall cactus guide shows how that looks with a true cactus. Rescues like this one sit alongside the rest of my care notes, which start on the Succulent Primer home page.
Coral Cactus Plant Questions
How long does a coral cactus live?
A grafted coral cactus can last for many years if the rootstock stays healthy, and the graft is usually the weak point. When the rootstock fails, cutting and rooting the crest, as above, gives the plant a second life.
How much sun does a coral cactus need?
It does best in bright light with some gentle direct sun, ideally in the morning. Too little light fades the color and stretches the crest; harsh afternoon sun can scorch a plant that isn’t used to it.
Is the coral cactus plant poisonous?
The milky sap can irritate skin and eyes and shouldn’t be swallowed. Wear gloves when you cut it, and keep the plant out of reach of pets and small children.