Fungicide for Cactus: Best Copper Options and How to Use Them
Quick answer
A fungicide for cactus protects clean, healthy tissue, and it can’t bring back flesh that’s already dead. Copper is the ingredient Texas A&M AgriLife Extension names for cactus anthracnose and for fresh wounds, and it suggests captan for stem rot in seedlings. Whichever you choose, deal with the damage first, then apply the product exactly as its label says.
This guide matches each symptom to a product, then walks through three separate jobs: treating spots on the skin, cutting black rot out of a stem, and soaking a batch of bare-root plants. Plenty of cactus problems need no fungicide at all, so the table comes first.
Best fungicide for cactus: match the product to the symptom
The best fungicide depends on what’s actually on the plant, and for a good share of cactus diseases nothing in a bottle helps. Texas A&M’s Plant Disease Handbook is the most useful US list I’ve found, and this table boils down its cactus entries:
| What you see | What the handbook calls it | What it recommends |
|---|---|---|
| Moist, light brown rot with pale pink pustules | Anthracnose, a fungus | Remove and destroy the diseased parts; a copper spray may help check it |
| Small round black spots growing to 1 to 2 in (2.5 to 5 cm) | Dry rot, a fungus | Remove and destroy the plant |
| Spots from 1/4 in (6 mm) up, ringed by small raised dots | Charcoal spot, a fungus | No cure; remove and destroy the plant |
| Watery, soft, black tissue that breaks down fast | Soft rot, a bacterium | Avoid wounds, treat broken surfaces with copper right away, keep humidity down |
| Seedlings with yellow spots that shrink into brown mummies | Stem rot, a fungus | Captan should give some control |
| Rusty-colored, corky patches on the stem | Scab, thought to be a form of edema | No fungicide; more light and lower humidity |
Three of those six rows start with removing the affected part or the whole plant, and that’s the honest shape of this topic. Matching a photo to a table isn’t a lab result either, so treat these names as a best guess. A county Extension office can often point you to a plant clinic if the plant is worth the trouble.
Soft tissue at the base of the stem is a different job, because the plant has to come out of its pot. For that, go to the 11 steps on treating cactus root rot. If the marks don’t match anything here, the chart of cactus problems separates sunburn, scale, spider mites and normal corking.
Copper fungicide for cactus and the other US options
With a likely problem in mind, the choice narrows to a few ingredients, sold under many brand names. These are the ones that come up for cacti:
- Copper. It’s sold as a spray or a dust, and it works as a protectant by stopping spores from germinating on the surface. It won’t clear an infection already inside the flesh. The Missouri Botanical Garden warns that copper can burn plants in wet, cool weather and can harm fish, so keep it out of drains and ponds.
- Sulfur. The same garden lists it for powdery mildew, leaf blights and certain rusts. It can injure plants in high temperatures, it shouldn’t go on within 20 to 30 days of a spray oil, and it may irritate your eyes and skin. Texas A&M’s cactus entries don’t mention it.
- Captan. The handbook names it only for seedling stem rot, and only for “some control,” so I wouldn’t treat it as a general cactus product.
- Natural fungicide for cactus. Copper and sulfur are the usual minerals sold this way. Natural doesn’t mean gentle, since both can damage plants. Growers also dust cuts with cinnamon, but there’s no label rate behind that.
Whatever you buy, the label has the last word. The US Environmental Protection Agency puts it bluntly: “the label is the law,” and using a pesticide in a way that doesn’t match its labeling breaks federal law. Check that it covers ornamental plants, that it allows your method (spray, dust, or dip), and what the rate is.
When you compare bottles, look at the active ingredient and its percentage, because the right dilution depends on both. Never borrow a ratio from a forum post or from a product sold in another country.
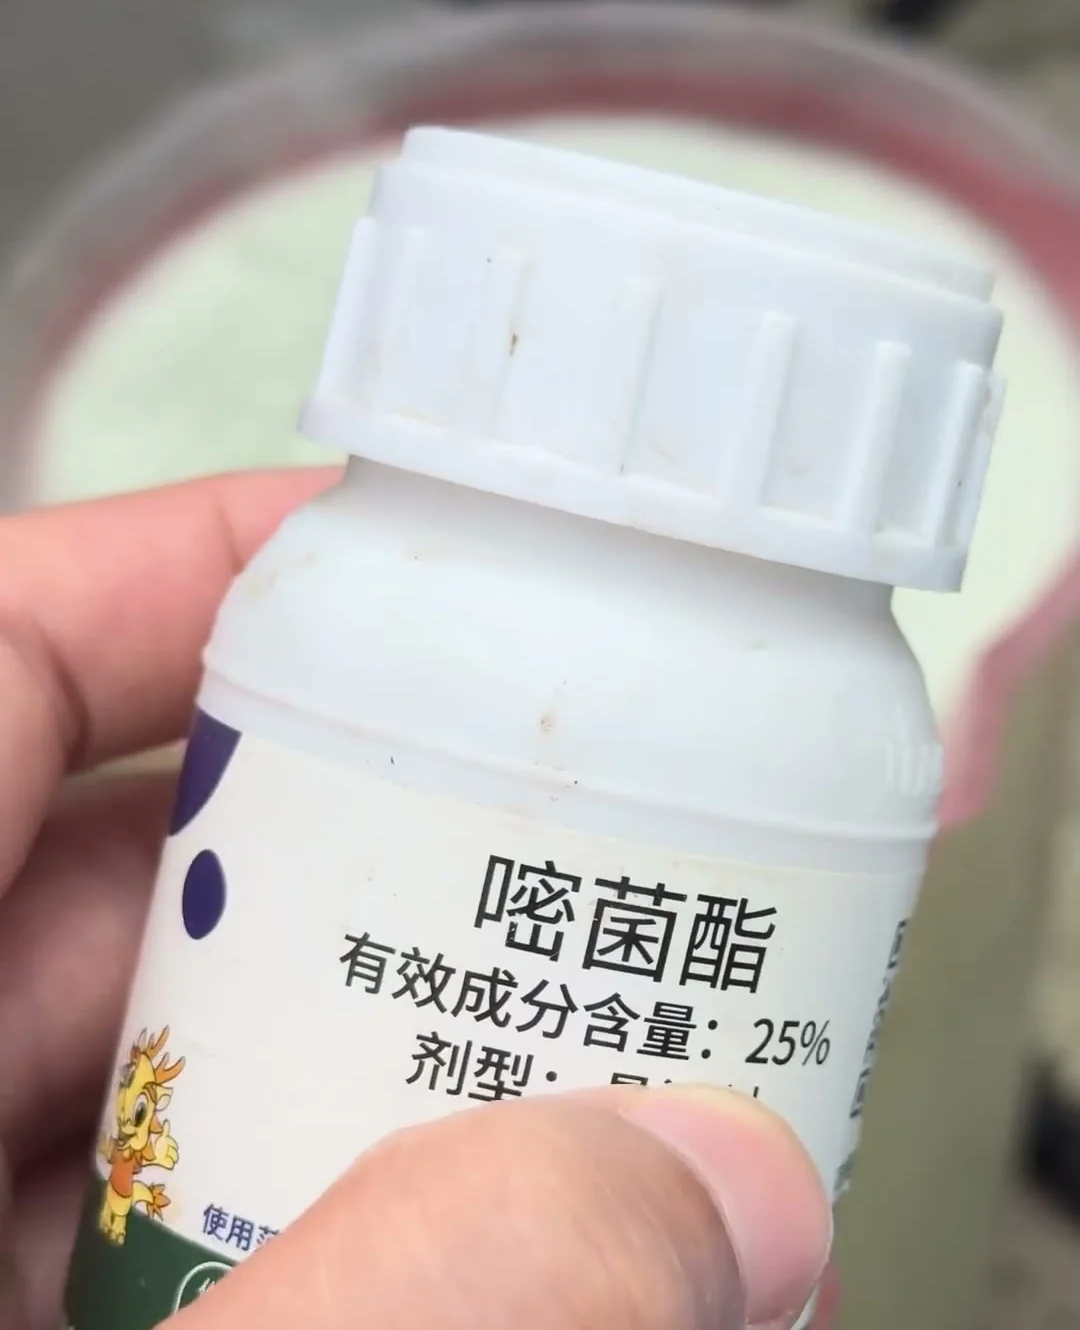
Many rates are written with field crops in mind, not a potted cactus. That’s no reason to go stronger, and if the label gives a range, I’d take the lowest rate. Try any new product on one plant first and watch it for a week or two before you treat the rest.
What you need before treating a cactus with fungicide
Each of the three jobs below uses a slightly different kit, so gather only what yours calls for:
- A fungicide whose label covers ornamentals and the way you plan to apply it
- Gloves and a mask, plus anything else the label asks for
- Rubbing alcohol in a small spray bottle (spots and cuts)
- A small soft brush (spots)
- A thin, sharp knife and a clean stick (cuts)
- A thick folded pad to hold the stem through (cuts)
- A graduated syringe and a jug with volume marks (soak)
- A mesh-bottomed tray that sits inside a solid tray (soak)
Keep pets and children away while you mix and until the plants have dried.
How to treat fungal spots on a cactus without making them worse
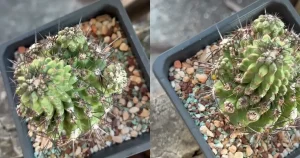
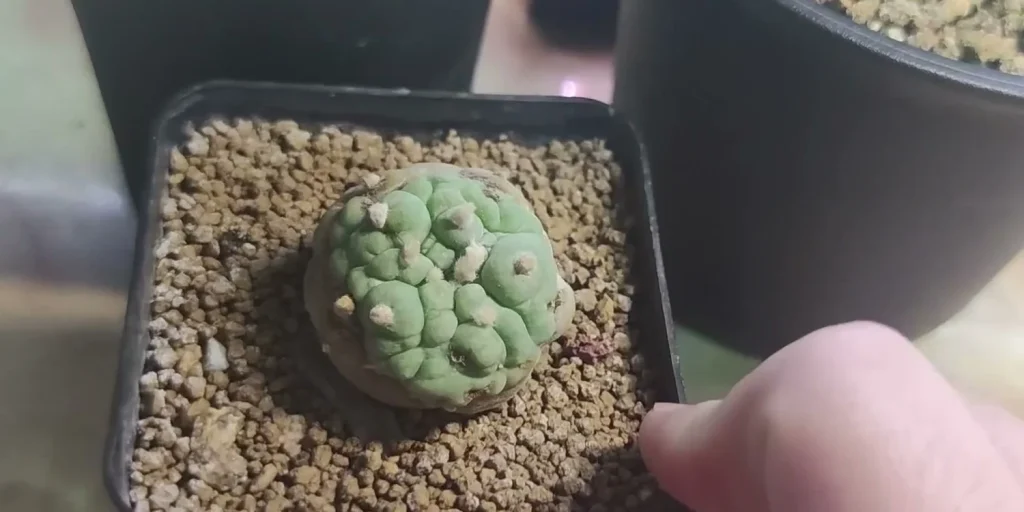
Spots are the job I learned the hard way, and most of what I know comes from getting it wrong. One of my grafted globes arrived with a few small flecks on it. I didn’t think much of them and put it in with the others, and over time the flecks multiplied and spread to the plants around it. I never had it tested, so all I can say is that it behaved like a fungus.
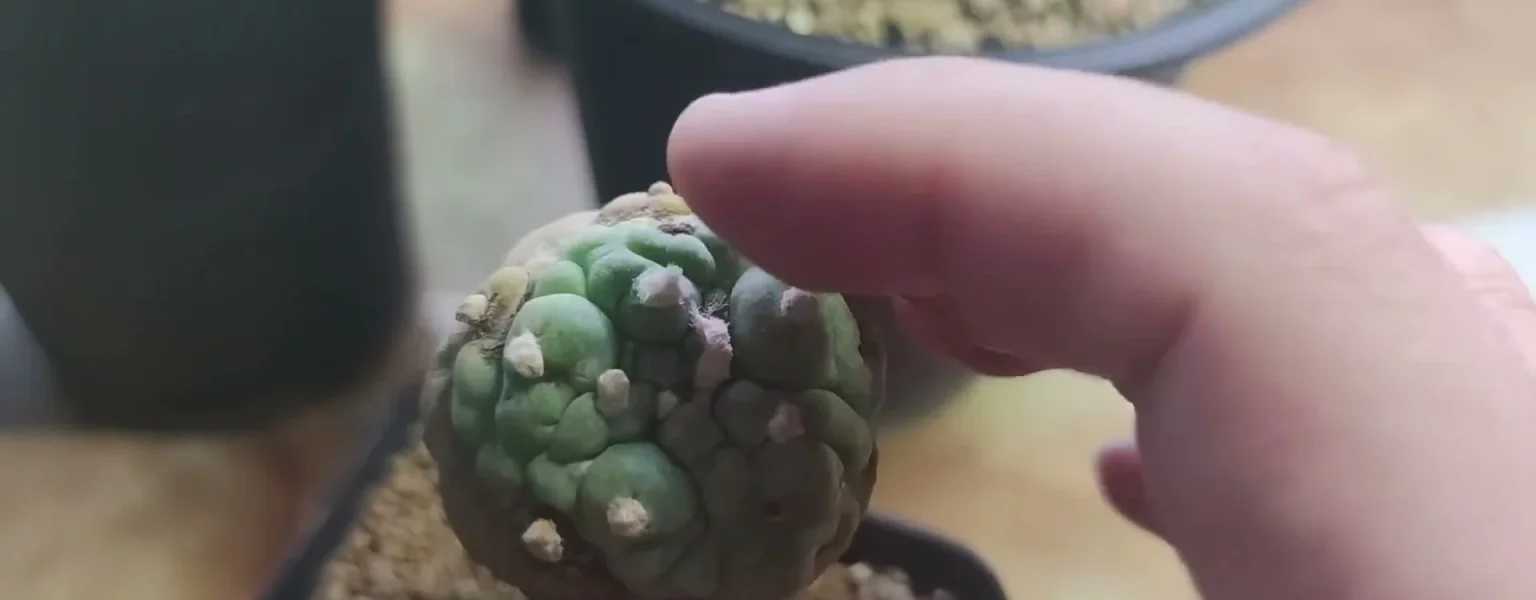
An active spot is a dark brown dot under a thin layer of skin, and it fades as it hardens. Picture a nail: the head is the mark you can see, and the shaft runs down into the flesh, so digging one out leaves a pit. Scale can look similar, but it sits on top of the skin and lifts away.
Don’t pick at the spots. I dug at one, and within two days they’d broken out across the plant. All along the tubercles and grooves, every place where the skin had split turned brown. I ended up peeling and shaving the patches away with tweezers and a small knife, and that plant has never looked right since.
Don’t drench the plant either. My first attempt was fungicide mixed into water, and the spots spread faster once the plant was wet. What finally worked was keeping the treatment on the spots and off everything else.
Step 1: Spray the spots with alcohol. Mist each spot lightly and let it dry. Leave the spots in place.
The alcohol clears the surface, so the fungicide can go on next.
Step 2: Brush fungicide onto each spot. I mixed a powdered product with alcohol into a paste and painted it on with a small brush, covering every spot. That product was sold in China, so please don’t treat my paste as a recipe. With a US product, use the method its label gives, even if that means a light dusting instead.
After that, it’s a slow routine of checking and repeating.
Step 3: Repeat about once a month until the spots stop. I went on for months and swapped in a second fungicide now and then, so I wasn’t leaning on one ingredient. Stop when a spot has quit spreading and feels hard under your finger. The treated patches on my plants hardened first, then stopped growing.
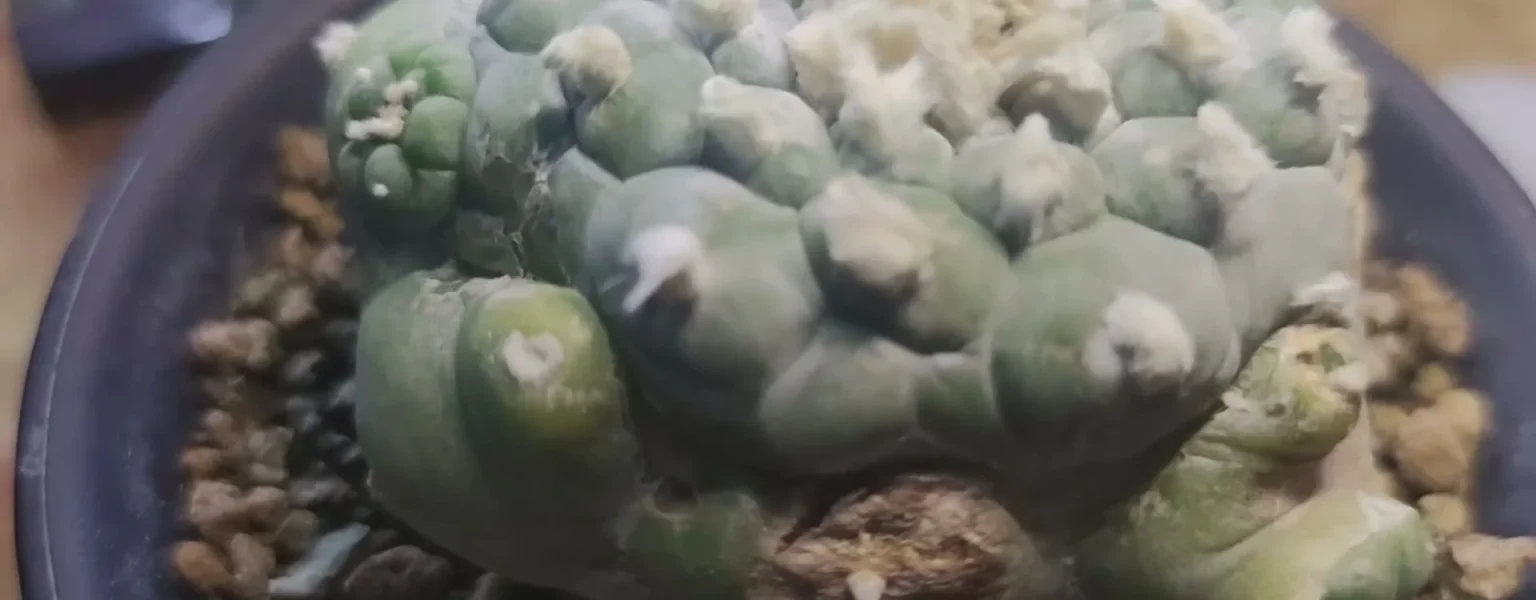
Hard spots aren’t gone, and they never turn green again.
Step 4: Wait for new growth to push the scars down. The old patches form a crust as hard as stiff plastic, and only fresh growth at the top will carry them lower over the years. Set the plant back in its pot and leave it dry for a while before watering. Mine was firm and in no need of a drink, and the new tubercles came in clean.
How to cut black rot out of a cactus stem and dust the wound
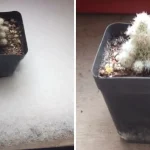
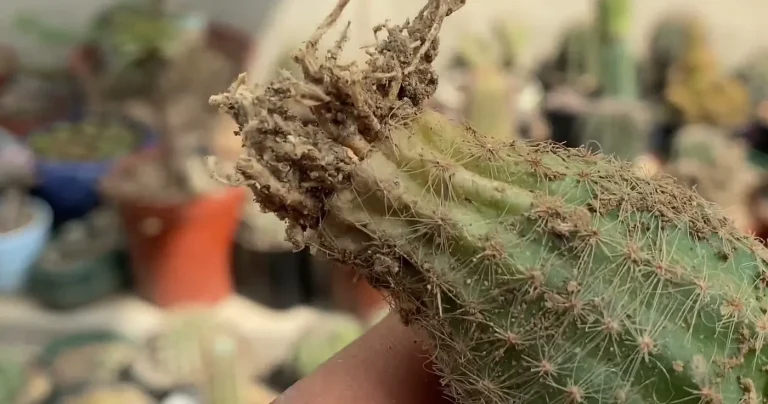
Spots stay near the surface, but black rot goes inward, so here the knife does the work and fungicide comes last. Treat the name loosely. It describes how the damage looks, and the plant shown here was never tested, so it may not be a fungus at all. Texas A&M’s soft rot, a bacterial disease, also turns tissue black.
Step 1: Probe the black patch with a stick. Push a clean stick gently into the patch to find out how far in it goes. Do this as soon as you notice it, even if the mark is small, because it won’t stay small.
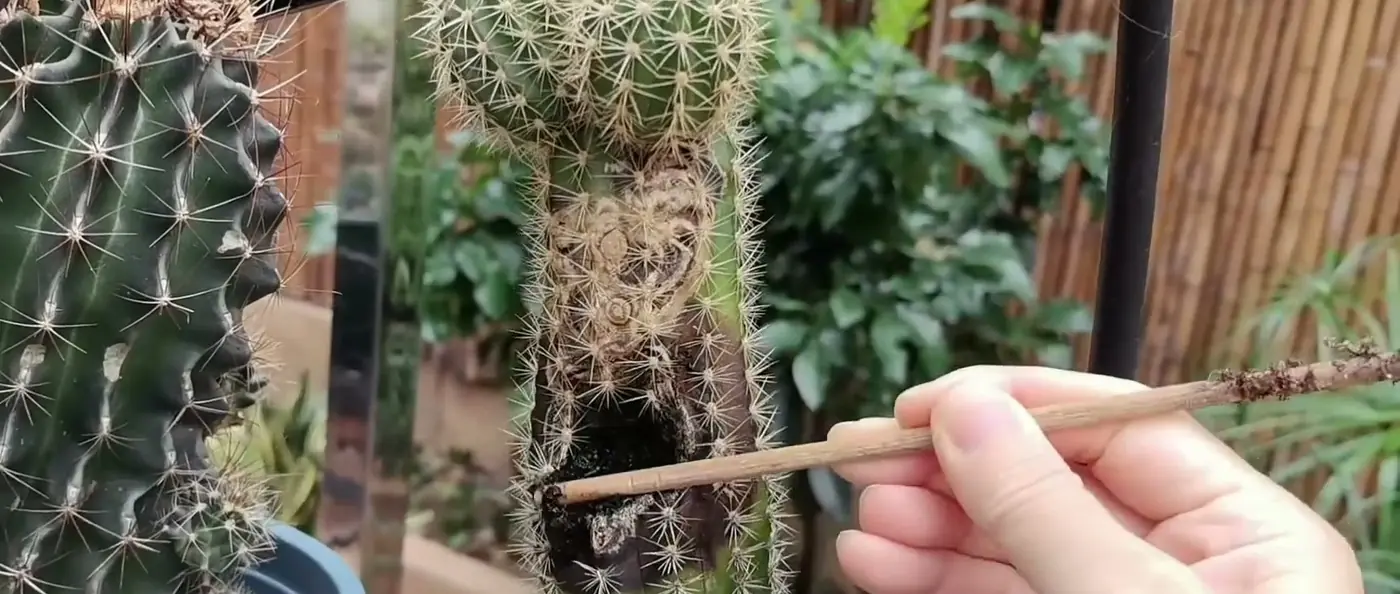
A hole that swallows the stick needs cutting, not a surface treatment.
Step 2: Cut into the black area with the stem held in a pad. Wrap the folded pad around the stem and start at the black patch, aiming to dig out only the dark flesh. Wipe the blade with alcohol between cuts, which is my own addition here.
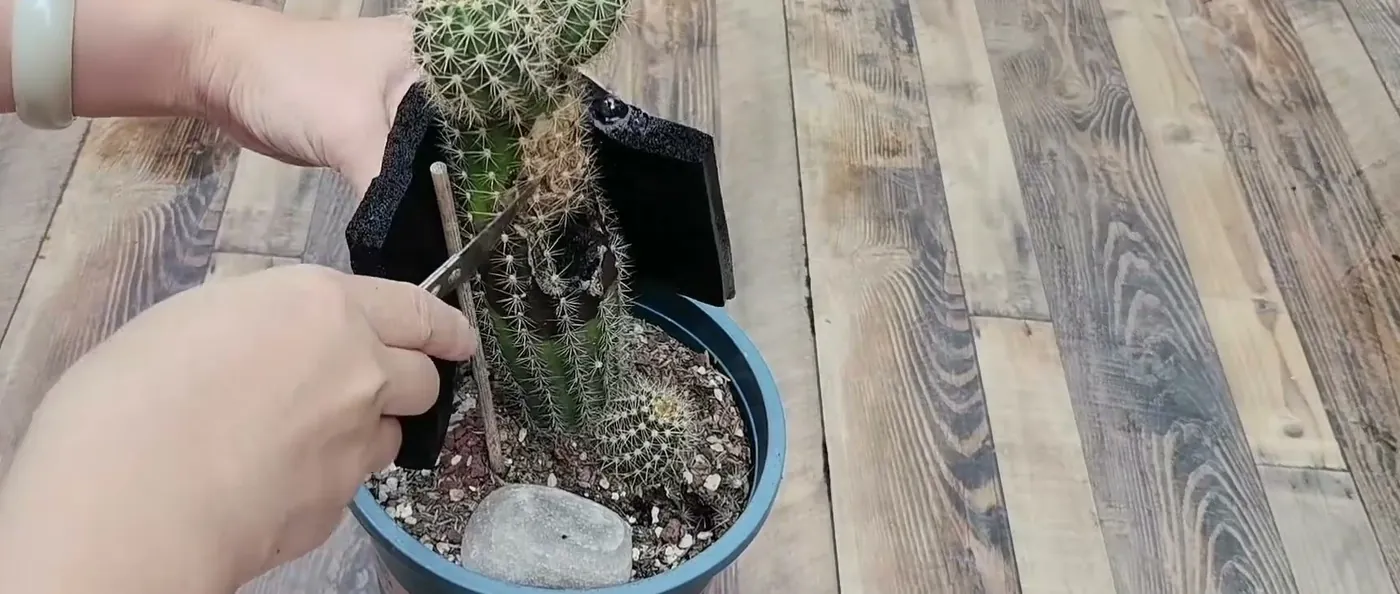
The first cut usually shows you there’s more than you’d hoped.
Step 3: Open the stem if the black keeps going. Slice the stem apart at the rotted section so you can see the full spread. Look for black running up and down the core.
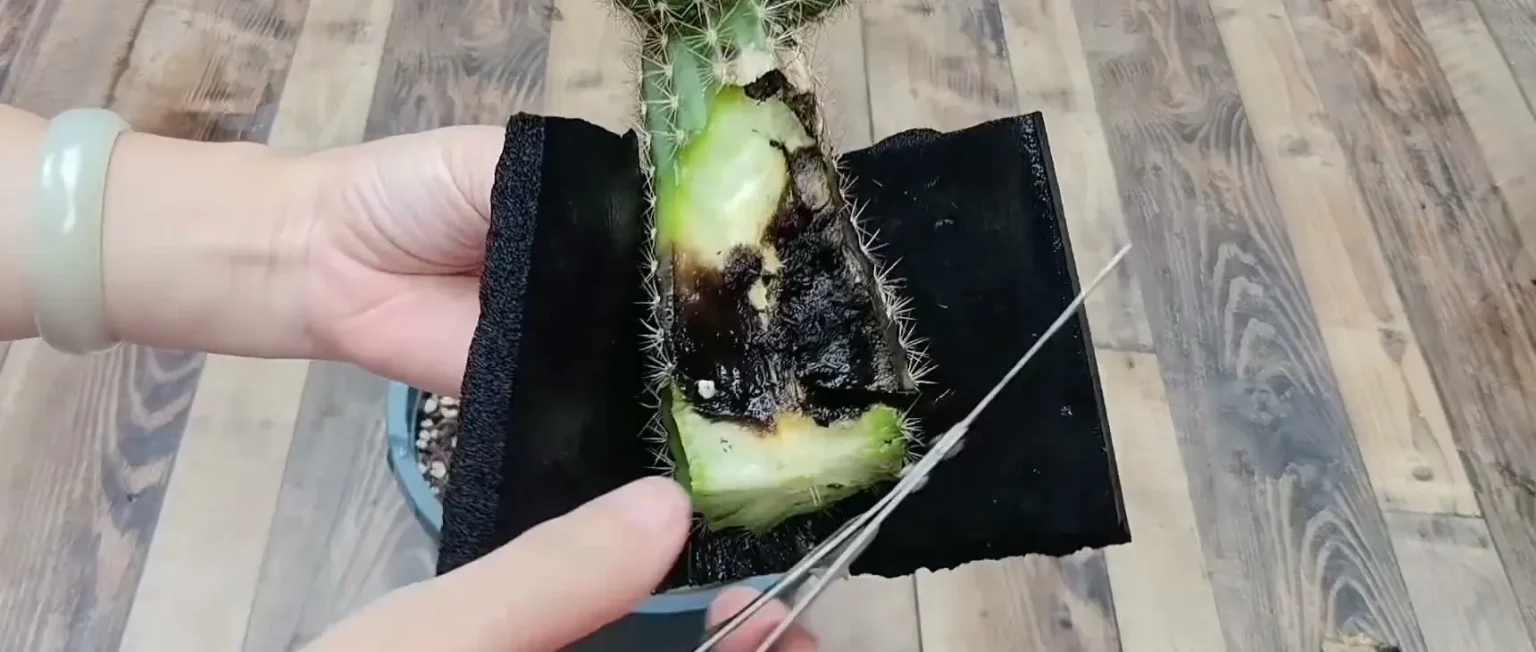
Once the core is on view, you can decide what’s worth keeping.
Step 4: Remove the whole section if the black has reached the center. Saving a thin shell of green around a black heart achieves nothing. Cut the section away and put it in the trash, keeping only the clean parts. On this plant, two healthy offsets sat above the rot, and they were worth more than the stem between them.
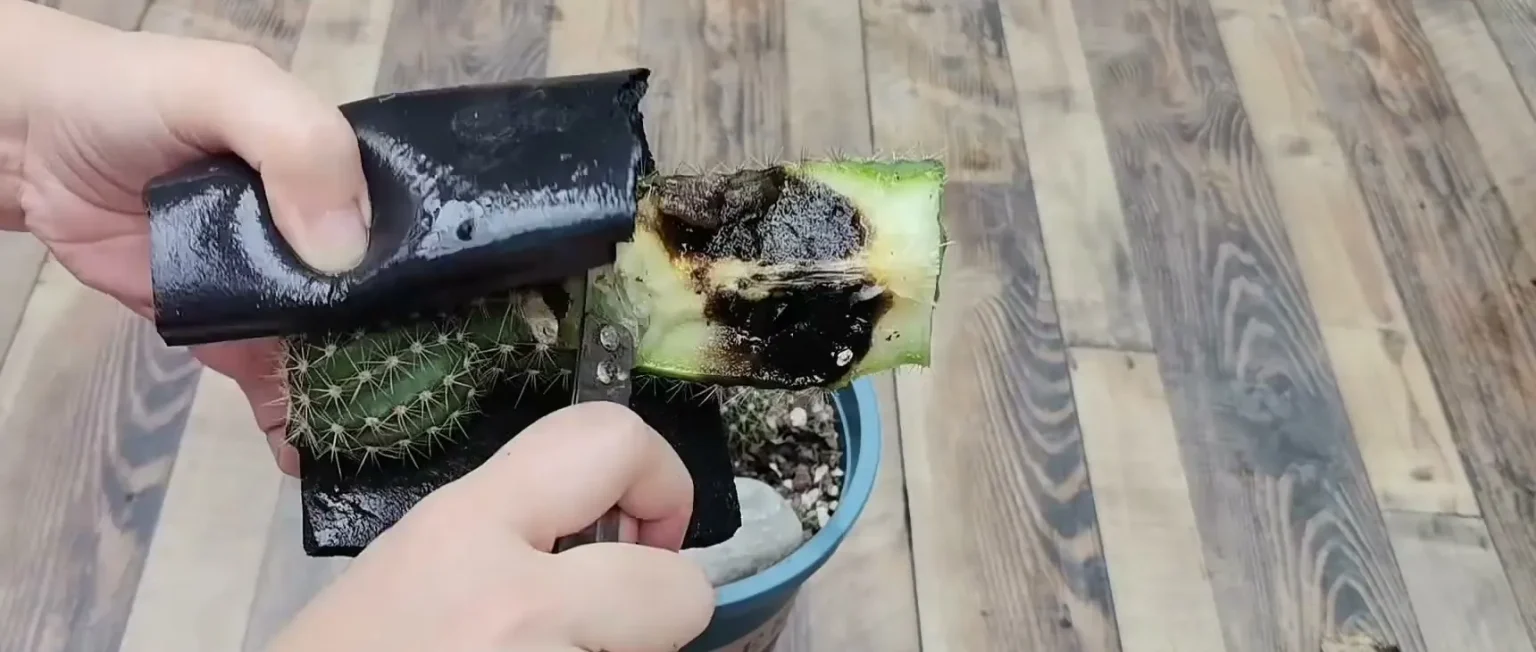
Everything you keep now has to be clean right to its edge.
Step 5: Trim each piece until no black remains. Shave thin slices off the cut faces, including any dark flecks close to the offsets. Rot left behind can easily infect other parts of the plant, so one more slice beats one too few.
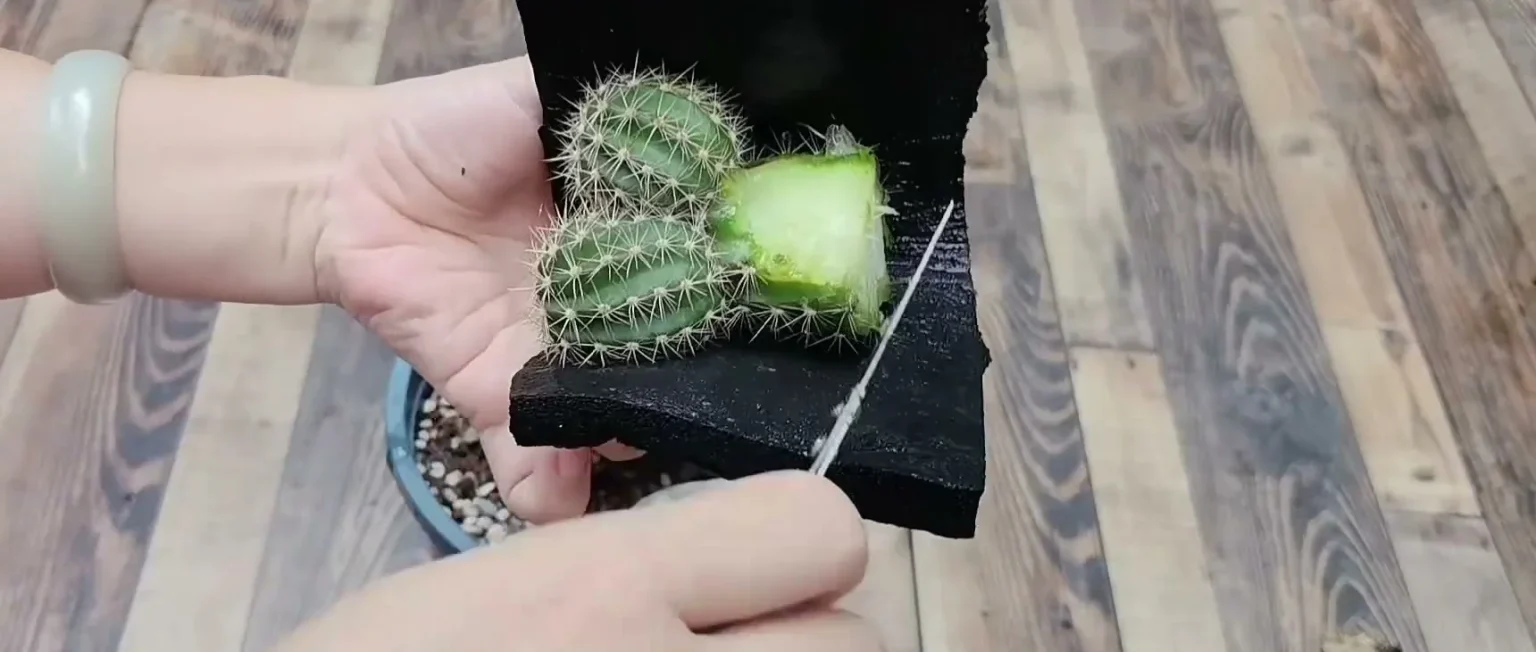
Only now is the fungicide useful, because there’s healthy tissue for it to protect.
Step 6: Dust the cut faces and let them dry. Cover the stump in the pot and the piece you saved with a thin coat of powder, then leave both to dry. In the US, a copper dust labeled for ornamentals is the closest match, given what Texas A&M says about treating broken surfaces.
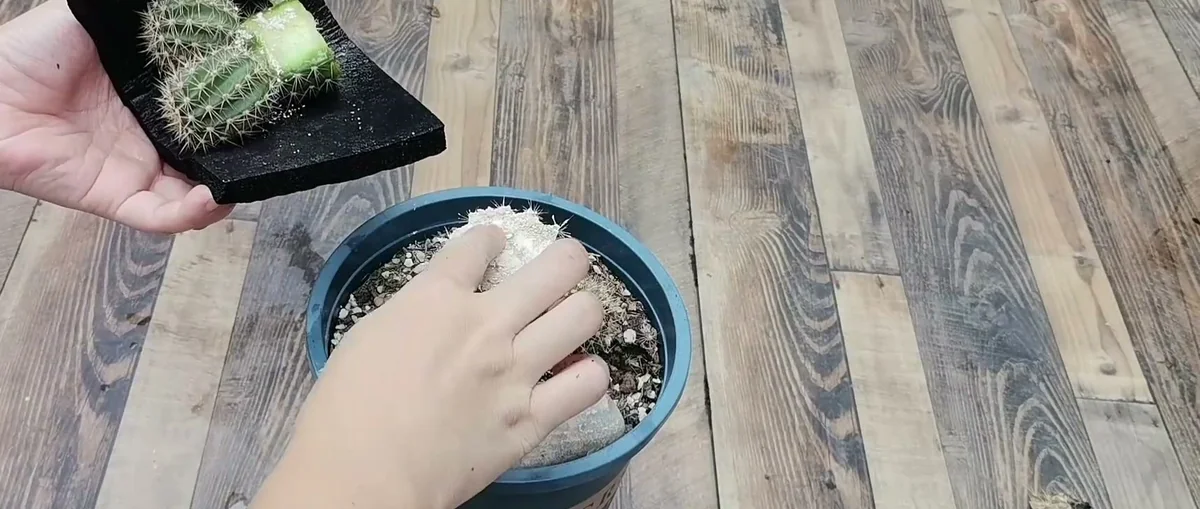
Treated in time, a healthy stump often pushes new offsets from around the cut. The saved top is a cutting by then, so root it the way I describe for a columnar cactus with its top cut off.
My own rescues stop at alcohol and a long drying period, and I honestly can’t say how much the powder adds. It’s a reasonable extra for a badly infected stem. The drying matters more than either.
How to soak bare-root cacti in fungicide before potting
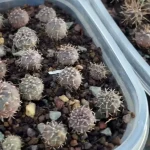
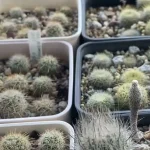
A short bath is a batch job, meant for someone bringing in or re-rooting many bare plants at once, where one sick plant could cost the whole collection. A single windowsill cactus doesn’t need it. Do this only with a product whose label allows a dip or drench on ornamentals, and skip it if the label says spray only.
Step 1: Trim the roots and dry the plants first. Cut back the roots and leave the plants under a fan for several days, so the cuts are dry before they meet any liquid. Lay them out on the mesh tray with their name tags.
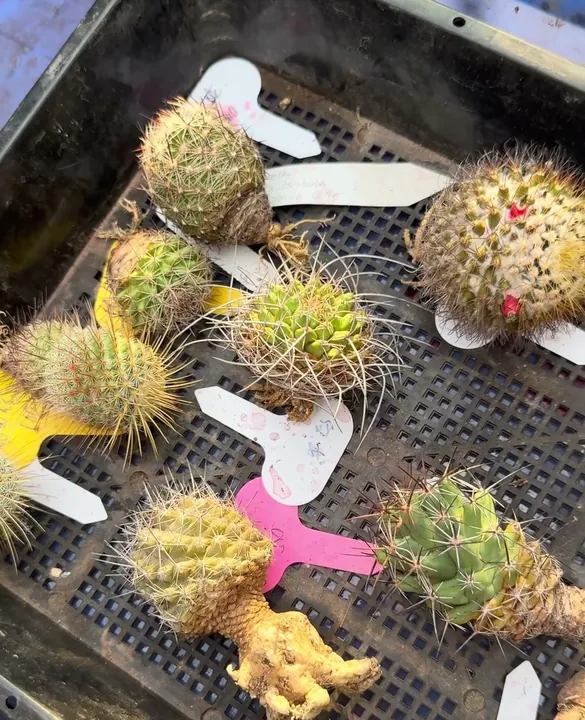
While they dry, you can work out the mix.
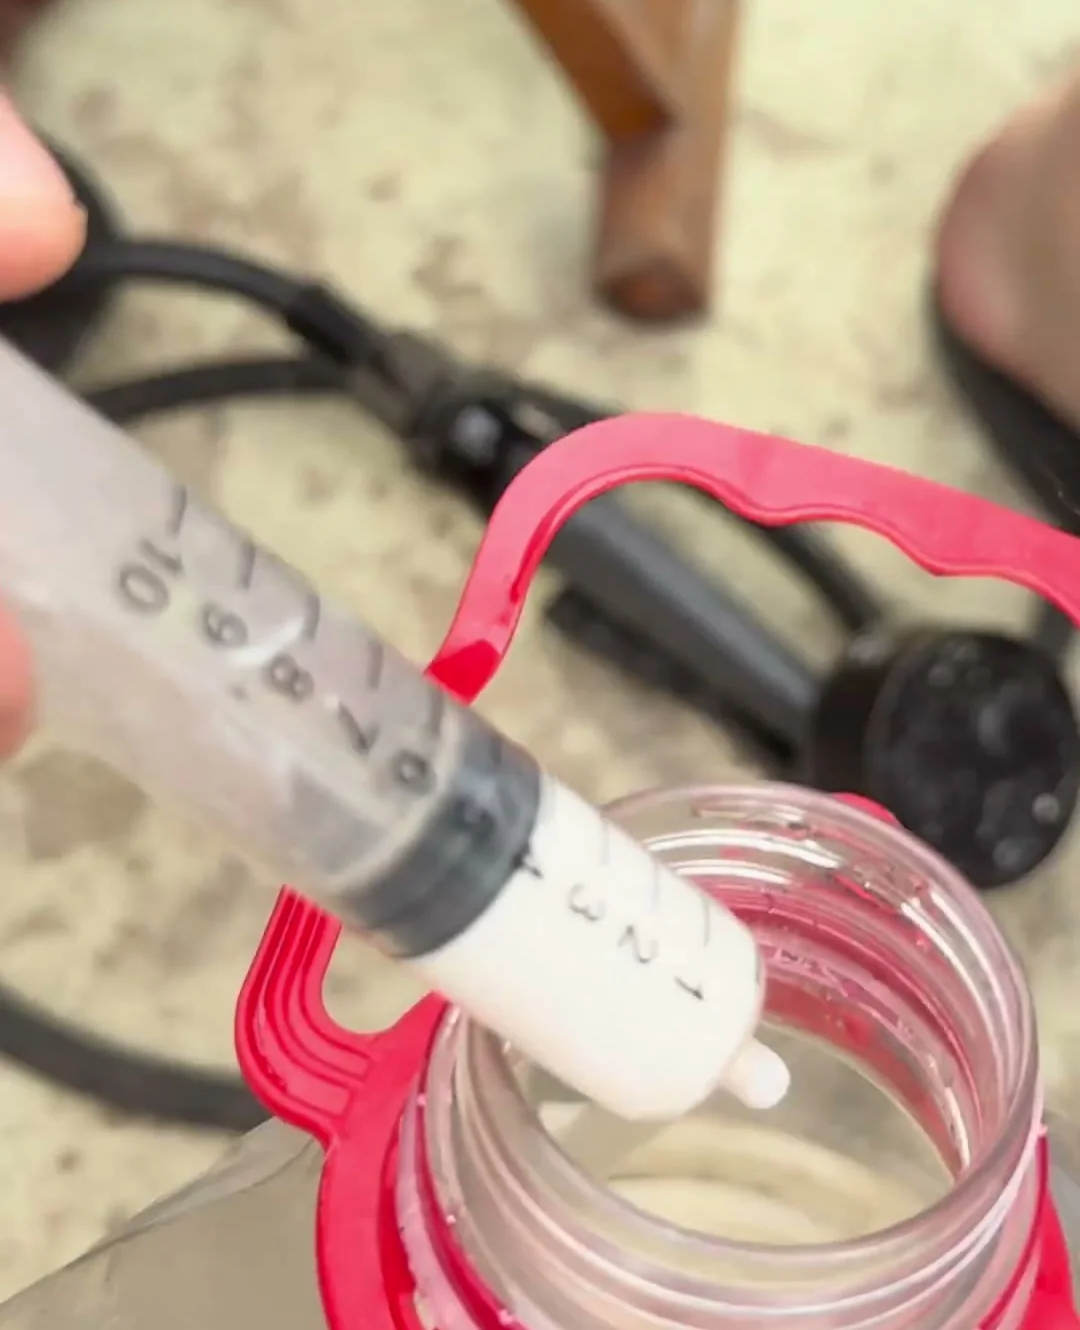
Step 2: Put on gloves and a mask, then measure the dose. Fill a marked jug with water, working out the amount from the label rate. About 2 liters (roughly half a gallon) is enough for a tray like this one. Draw up the fungicide with a graduated syringe and add it to the jug, because a kitchen spoon isn’t accurate at such small amounts.
Before pouring, take a last look at what’s on the tray.
Step 3: Leave out any plant with its base cored out. Plants that had rotten roots dug out of them don’t go in this bath. Treat those wounds separately and dry them, as covered in the root rot guide.
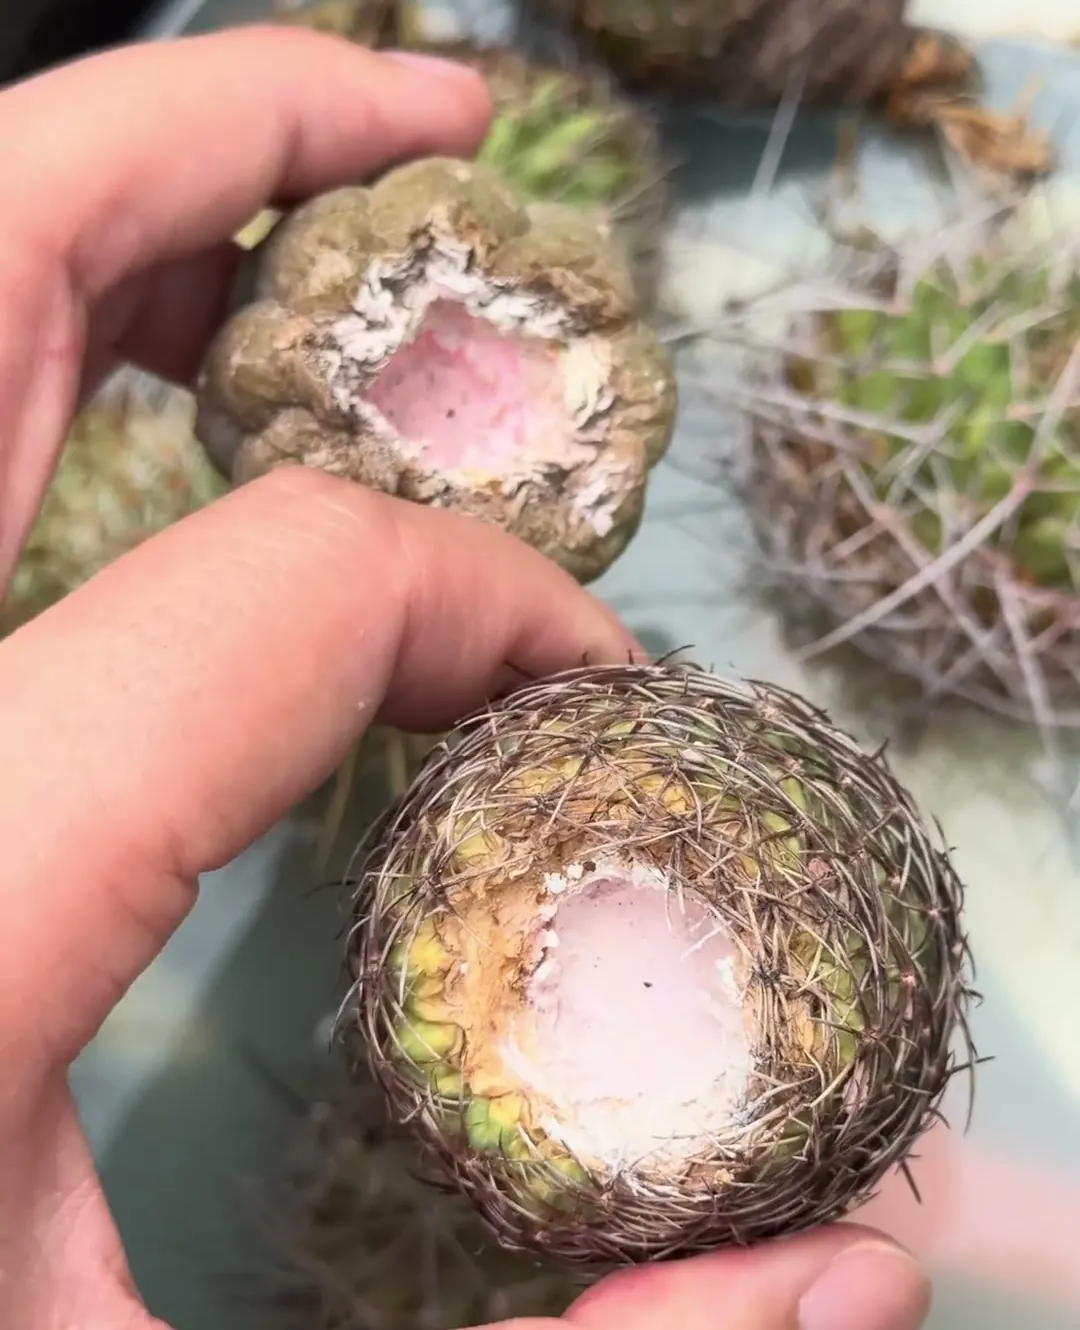
The rest of the batch can go in together.
Step 4: Pour the solution into the tray. Set the mesh tray in the solid tray, then pour until the liquid reaches the lower body of each plant. The milky green color in these photos comes from that particular mix, so yours may look different.
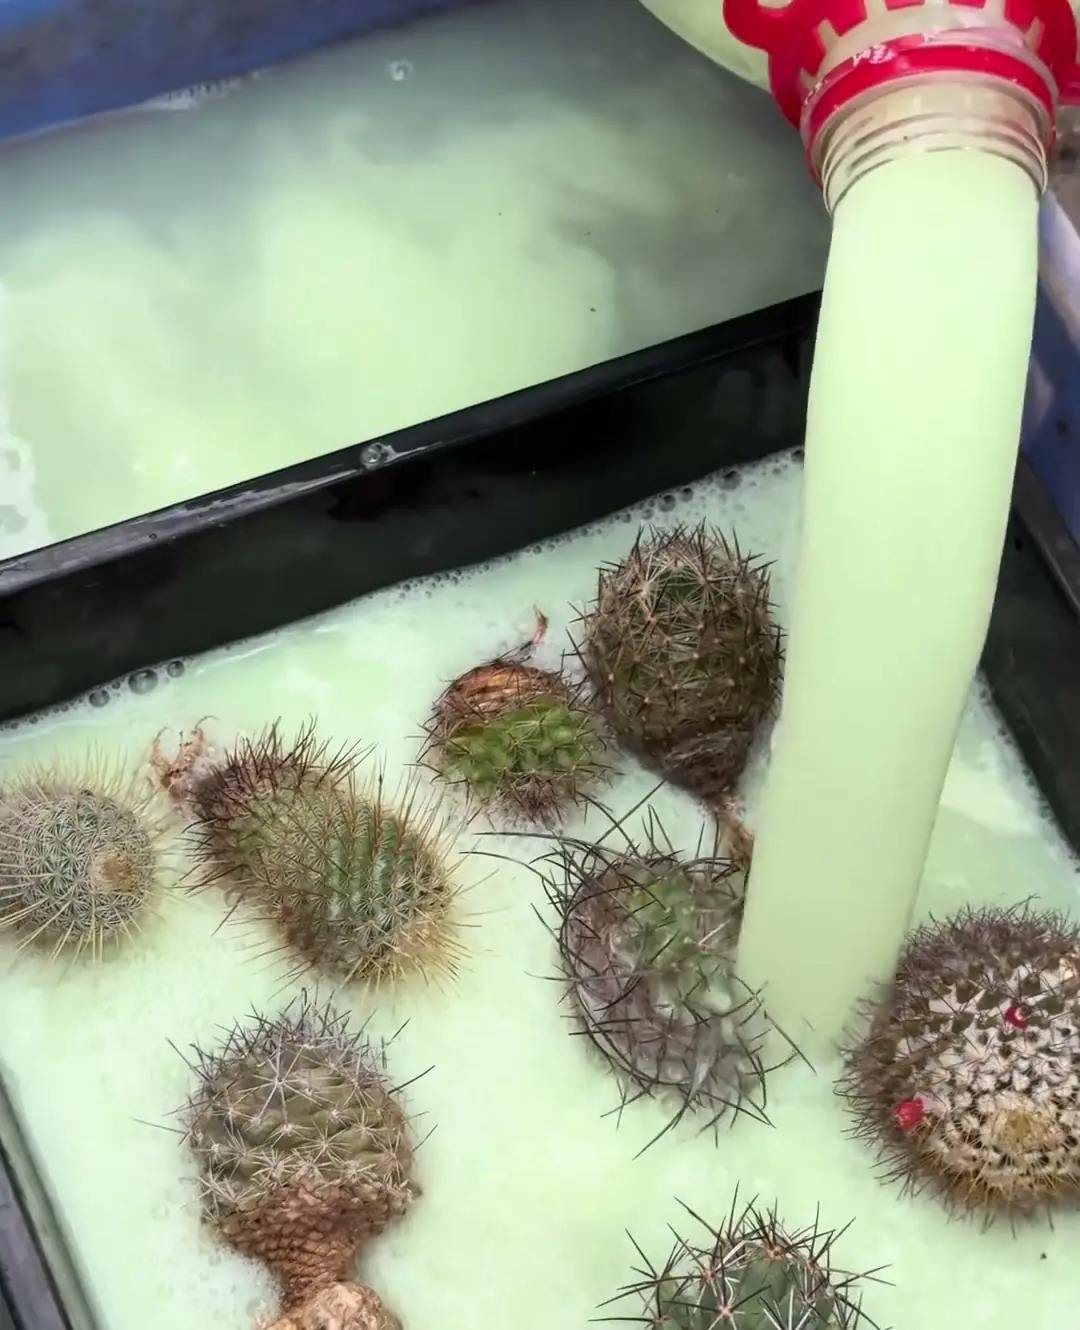
From here on, the clock matters more than anything else.
Step 5: Soak for about 10 minutes. A few minutes over won’t matter, but don’t walk away. A cactus left too long can take up so much water that it splits open.
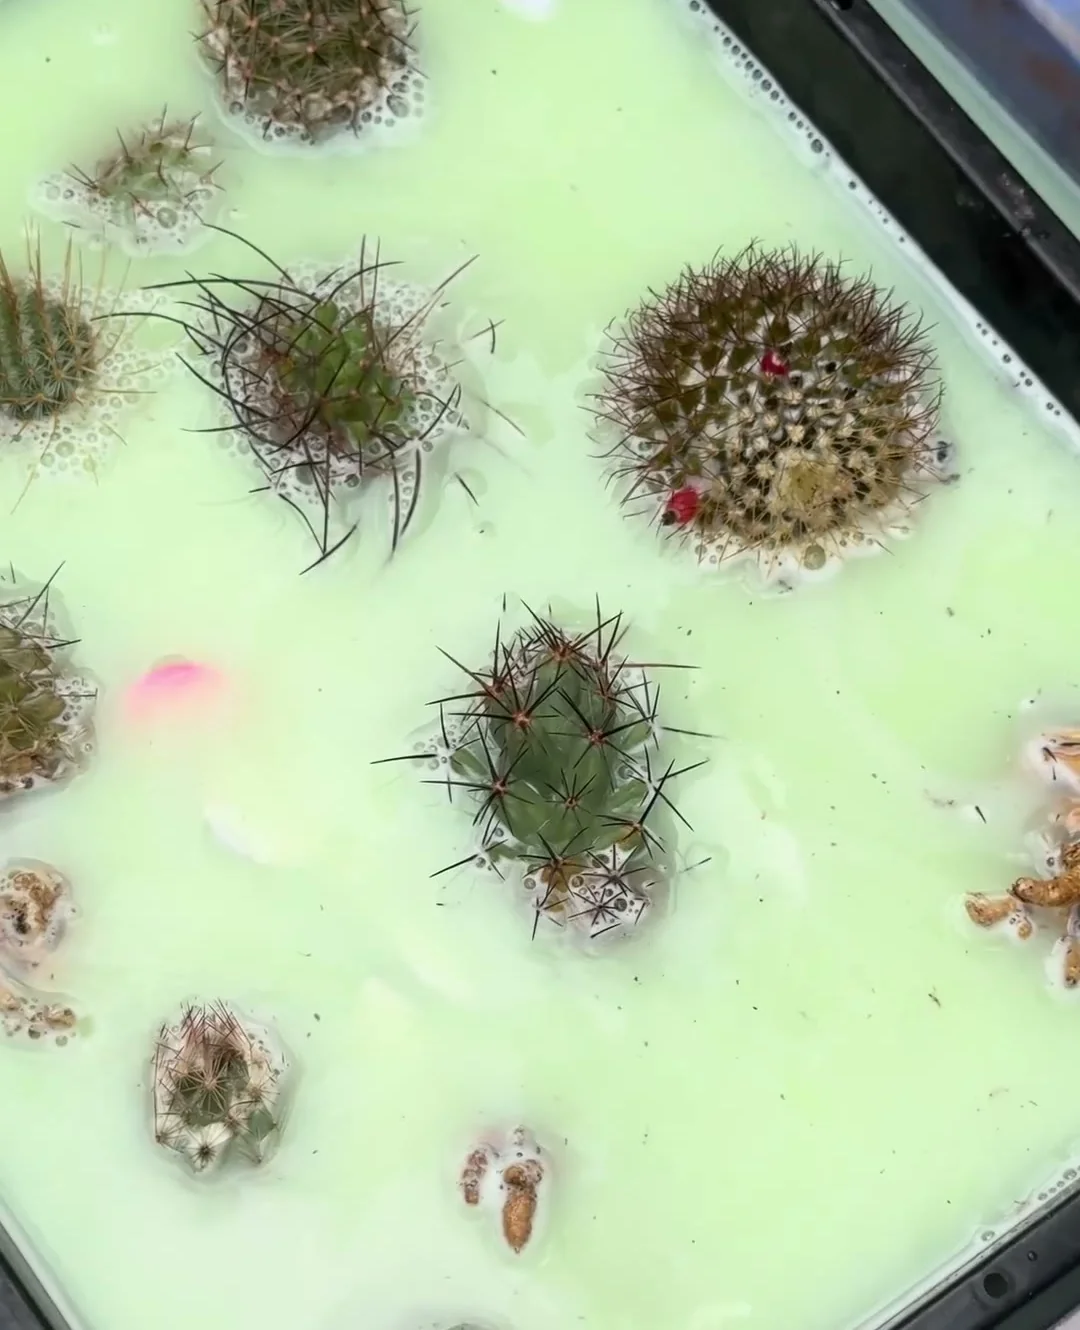
When the time’s up, the mesh tray earns its place.
Step 6: Lift the mesh tray out and let the plants dry. Raise the whole rack at once, let it drain over the solid tray, and move it somewhere airy. Once the plants are dry they can go into pots as normal, following the cactus repotting steps from there.
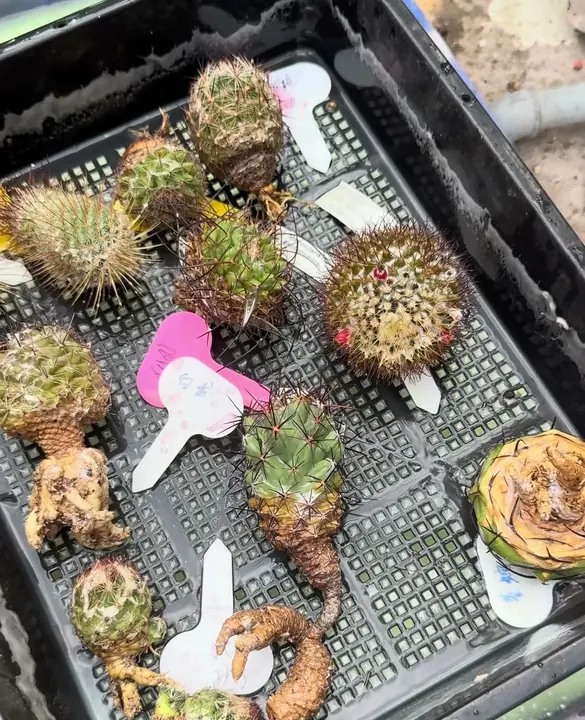
The plants use up very little, so most of the batch will still be in the tray.
Step 7: Deal with the leftover solution. Some growers use the remainder to soak pots or water other plants, which is only acceptable if your label allows that use on those plants. Otherwise, follow the label’s disposal instructions, and don’t tip it down a drain.
When not to use fungicide on a cactus
Those three jobs have clear reasons behind them, and that’s the test to apply anywhere else. I’d leave the bottle shut in these situations:
- The tissue is already soft or black. Cut it out first. Powder on top of rot only hides it.
- The marks are firm, tan and corky. That’s scarring, corking or scab, and none of them respond to spray.
- The plant is healthy. Spraying everything on a schedule won’t make up for wet soil or stale air.
- The weather is wrong. Skip copper in wet, cool spells and sulfur in high heat.
- You use spray oil. Leave 20 to 30 days between that and sulfur.
- You plan to eat it. Prickly pear pads and fruit need a product labeled for food use, so check before you treat them.
Most fungal trouble on my roof starts with water that stays around too long. Rain on a plant that hates it is the common thread, and so are mix that holds moisture and a tight, airless bench. The seasonal timing and pre-watering checks in how to water a cactus will prevent more problems than anything in this article.
Cactus fungicide questions
How do I cure rust on a cactus? First work out whether it’s a rust at all. Texas A&M’s list of cactus diseases has no rust fungus, but it does have scab, which makes rusty, corky patches and is thought to come from overwatering and poor ventilation. Its advice is more light and lower humidity. The scars stay either way.
Should I spray healthy cacti as prevention? I wouldn’t. Inspect every new plant the day it arrives and keep it away from the others for a few weeks. My spotted plant could have been stopped right there, and a routine spray wouldn’t have told me anything.
What is a good homemade fungicide for cactus? I don’t use one. Kitchen mixes have no tested rate for cacti, and wetting the plant can do more harm than the mix does good. Rubbing alcohol on spots and a dry, airy spot are what I’d try before anything homemade.
Can you use Epsom salt on a cactus? Not as a fungicide. Epsom salt is magnesium sulfate, a mineral salt that won’t stop a fungus, so it has no place in treating spots or rot.
Can spots spread from one cactus to another? Mine did, so I treat them as if they can. Move a spotted plant away from its neighbors, clean your tools with alcohol between plants, and check the others every week.
Everything above is cactus-specific, so don’t assume it carries over to leafy succulents. The Succulent Primer home page has the guides for those plants.