Cactus Root Rot: How to Save a Cactus Rotting From the Bottom
Quick answer
Cactus root rot is the decay of the roots and lower stem in soil that stays wet too long, usually from fungi or bacteria that move in through the damp mix. To save the plant, tip it out of the pot, remove everything soft back to firm green flesh, dry the wound until it’s hard, and replant in dry, gritty mix with the wound above the soil. A cactus can lose every root and still grow new ones from a dried cut, so the outcome depends on how much firm tissue remains.
The treatment below runs through 11 short steps, and you’ll only need some of them. Which ones depends on where the rot has reached, so the first job is finding that out with your fingers.
Signs of cactus root rot: soft at the base, wrinkled in wet soil
An overwatered cactus with root rot often looks thirsty, which is why so many get watered again at the worst moment. The soil separates the two. Press the base of the stem with your thumb, push a finger into the mix, and compare what you find here:
| What you find | What it usually means | What to do |
|---|---|---|
| Stem wrinkled or shrunken, soil wet | Dead roots: the plant can’t drink | Unpot it today |
| Stem wrinkled or shrunken, soil dry | Thirst | Water thoroughly; it should plump up within a few days |
| Base soft, discolored brown to black, or sunken | Rot has moved from the roots into the stem | Unpot it and clear the rot |
| Plant wobbles, or lifts out with almost no resistance | Few working roots remaining | Unpot it and read the roots |
| Tan, bark-like skin at the base that stays firm | Corking, which is normal aging | Leave it alone |
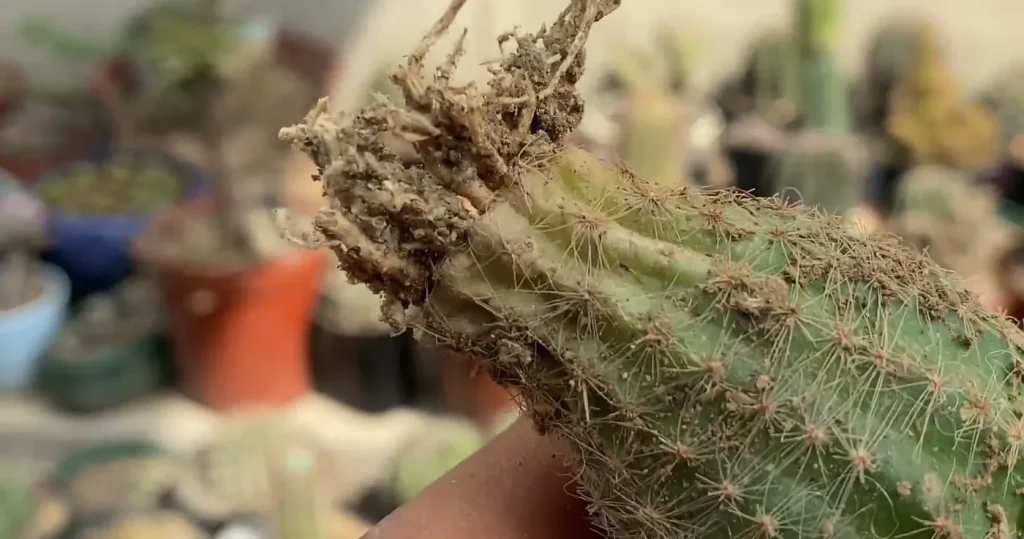
Once the plant is out, the roots settle the question. Sound roots stay pale, somewhere between cream and light tan, and they bend with a little spring. Rotten ones are black, soft or hollow, they often smell foul, and they collapse when you pinch them.
Don’t pull a skinny root only because it looks scruffy, since a firm one is probably still working. Six globe cacti, unpotted side by side, show the full range in what healthy and unhealthy cactus roots look like, with a table matching each root pattern to its cause. A firm plant that still looks wrong may have something else going on, and the symptom chart for cactus problems runs through sunburn, mealybugs, spider mites and scale.
How much of a rotting cactus can you save?
Most of a rotting cactus can be saved as long as some firm, clean flesh remains, and your approach depends on how high the rot has climbed. These are the four situations I sort plants into:
| Where the rot is | What you do | Steps |
|---|---|---|
| Some roots only, stem firm | Trim the bad roots, dry, repot | 1 to 3, then 8 to 10 |
| A pocket just above the roots, or a hole in the side of the stem | Pick the rot out with tweezers, dry, repot | 1 to 5, then 7 to 10 |
| The whole root end | Cut the root end off and root the plant again | All of them, skipping 4 and 5 |
| Soft right through, with only the top still firm | Save the top as a cutting | Cut above the rot, then treat it as a new plant |
That last case is no longer a repair job. The section on cutting the top off a columnar cactus in my propagation guide takes you from the cut through to the first roots. If nothing firm remains anywhere, the plant is gone, and it’s time to throw it out along with its soil.
Don’t postpone any of this until spring. Cut roots recover slowly in winter and I’d normally leave a repot until the weather warms, but a plant that’s actively rotting can’t wait.
What you need to treat cactus root rot
The equipment list is short, and everything should be within reach before the plant comes out of the pot:
- A sharp knife with a wide blade
- Tweezers
- Rubbing alcohol in a small spray bottle
- Thick gloves, or a strip of soft foam to grip the plant through
- A clean container and fresh, dry, gritty mix (about half to two-thirds pumice, perlite or coarse sand)
- A few stones, if the plant is tall
- A table or tray where the plant can lie for several days
Spray the knife and tweezers with the alcohol and let them dry before you touch the plant. Disinfect them again between plants, because a blade that’s been through rot can carry it into clean flesh.
How to save a cactus rotting from the bottom, step by step
The steps run from inspection, to clearing, to drying, to replanting. Work through the first three on every plant, then skip whatever doesn’t apply.
Step 1: Tip the cactus out of its pot. Lay the pot on its side, grip the plant through your gloves or foam, and ease the root ball out. If it sticks, squeeze the pot or run a tool around the inside edge instead of pulling on the stem, since a rotten base can tear away from the roots.
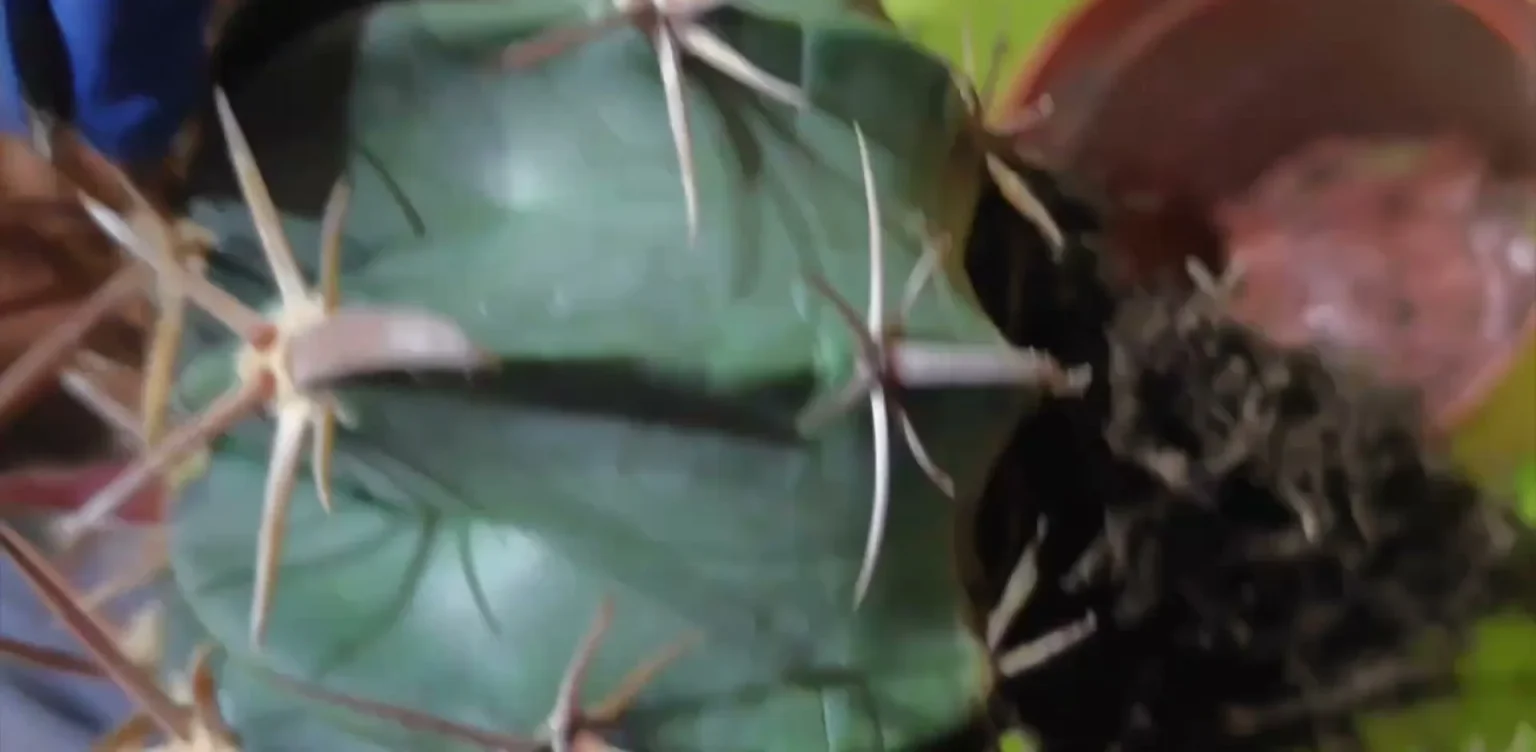
With the plant out, shake off the loose mix so you can see what’s underneath.
Step 2: Check the root mass section by section. Turn the roots toward the light and pinch them, one part at a time. Firm roots stay. Snip off anything black, soft or hollow with the knife, back to firm tissue. This trim is my own addition from ordinary repotting, and it’s all a plant with a sound stem needs.
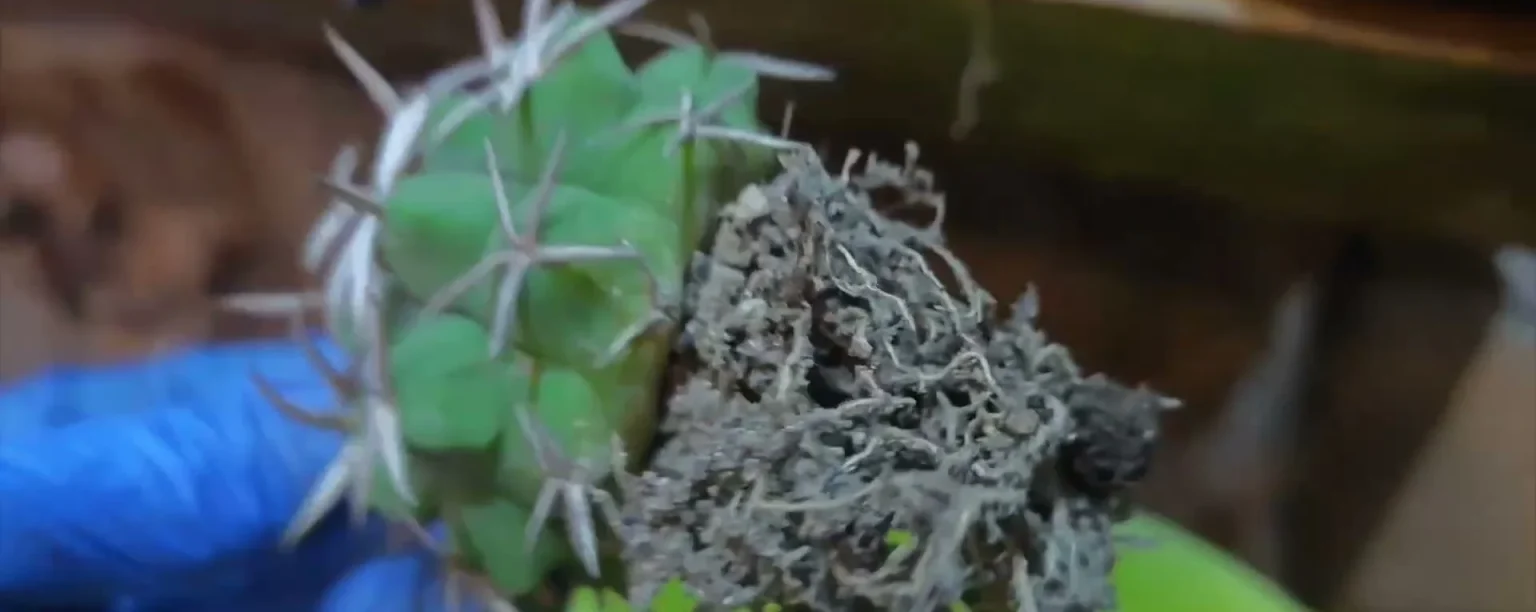
The roots are only half the story, because rot often sits right where they join the stem.
Step 3: Inspect the base where the stem meets the roots. Hold the plant upside down and look for brown patches, sunken spots and hollows, then press each one. Firm brown is usually old scarring. Anything that gives under your thumb is rot.
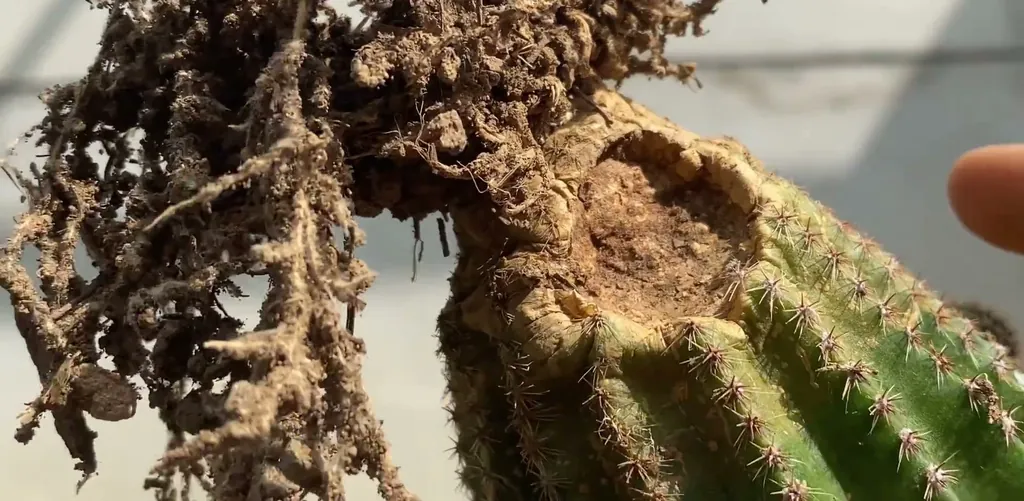
While the plant’s in your hands, examine the ribs as well, since a wet stem can rot from the side.
Step 4: Pick out any rot in the side of the stem. Push the tips of the tweezers into the hole and pull the soft brown flesh out a bit at a time. Keep going until the walls of the hole feel firm when you touch them.
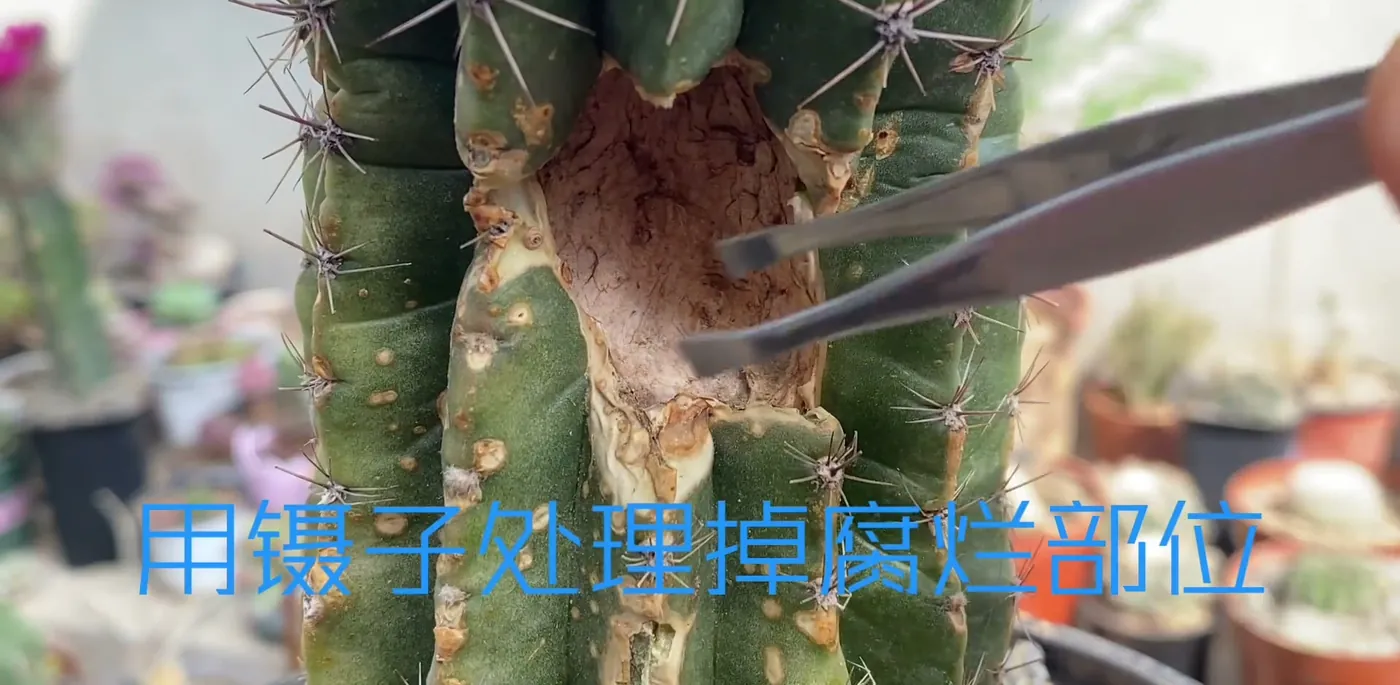
The same tool handles a pocket lower down, and that one needs more care because the roots are attached to it.
Step 5: Scrape out rot just above the roots. Work the tweezers along the edge of the rotted patch and scrape the soft tissue away until you reach green stem. Leave no soft shred behind, because anything you leave can keep spreading once the plant’s back in its pot.
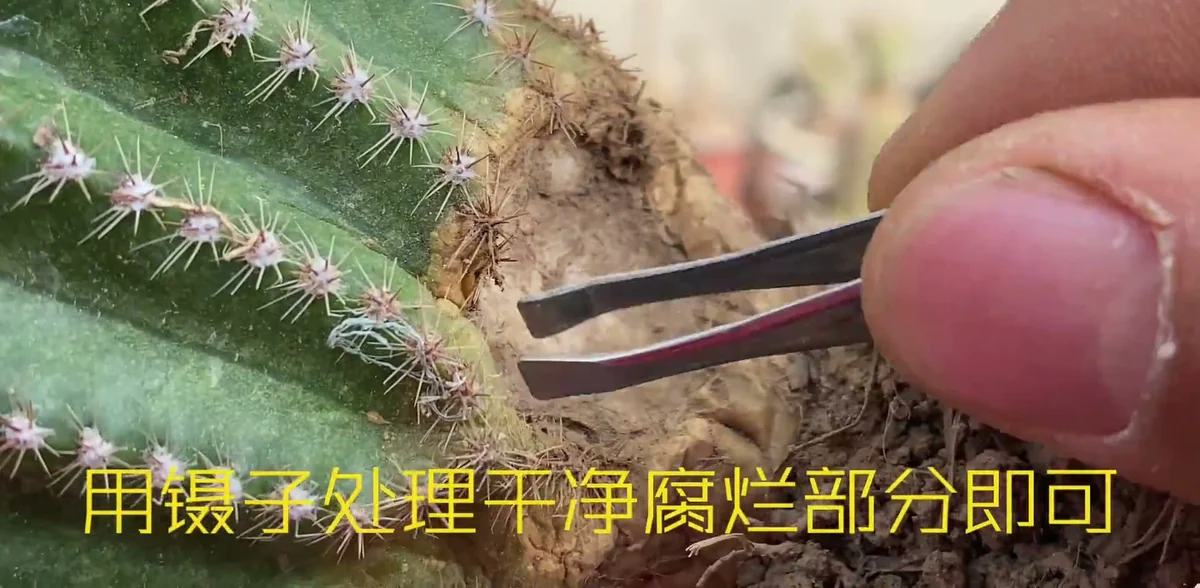
Tweezers only work when the roots are still worth keeping. When they aren’t, the knife takes over.
Step 6: Cut off the whole root end if the roots are gone. Slice straight across the base with the knife, removing all the roots in one go. Then shave off thin slices until the flesh is clean all the way across, with no brown streaks or soft spots.
Watch the ring inside the cut face in particular. That’s the vascular tissue, the plant’s water pipes, and brown dots there mean the infection has traveled higher than the skin suggests.
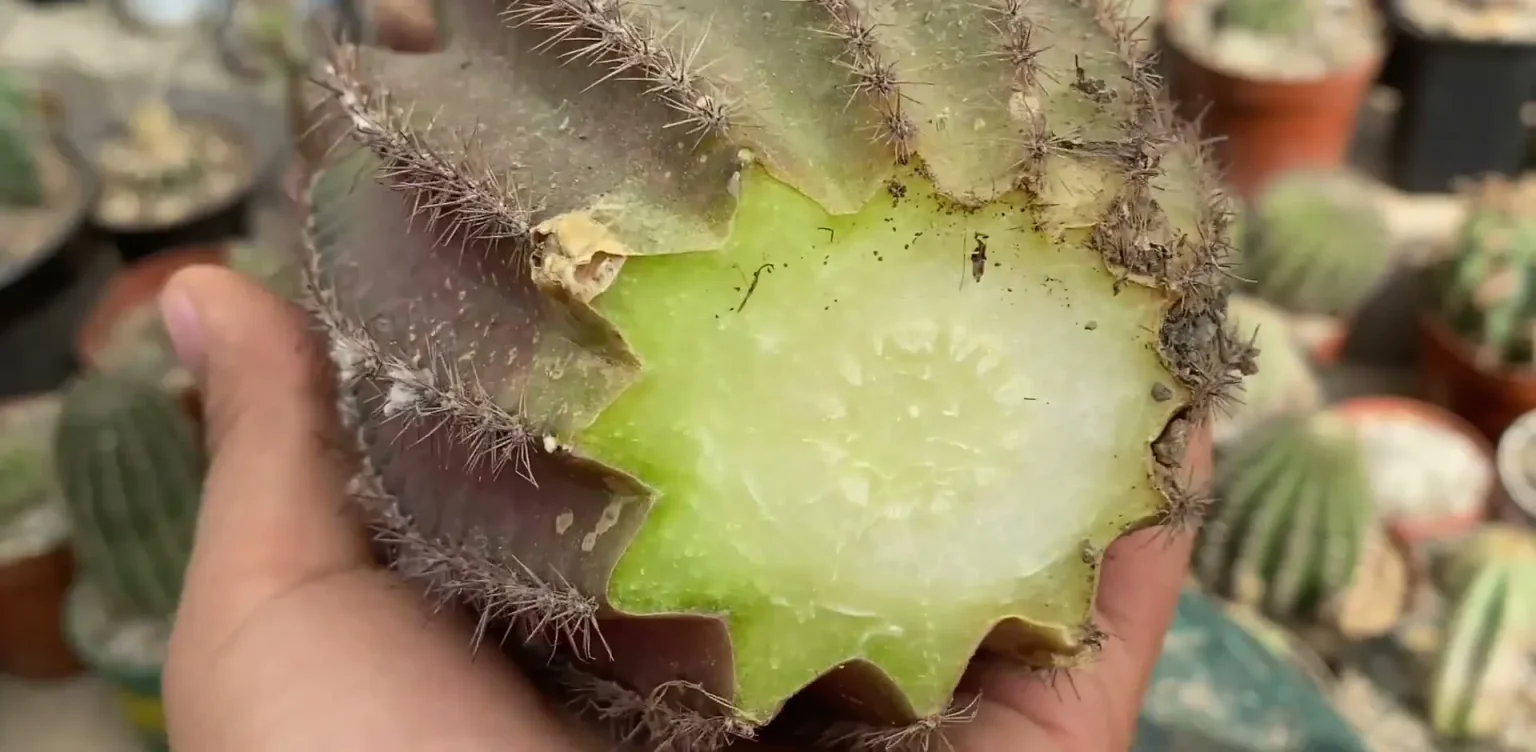
A fresh cut like that is wet and exposed, so it gets disinfected straight away.
Step 7: Spray the wound with alcohol. Hold the spray bottle close and mist the cut face until it’s evenly wet. Do the same inside any hole you opened in the side of the stem in Step 4.
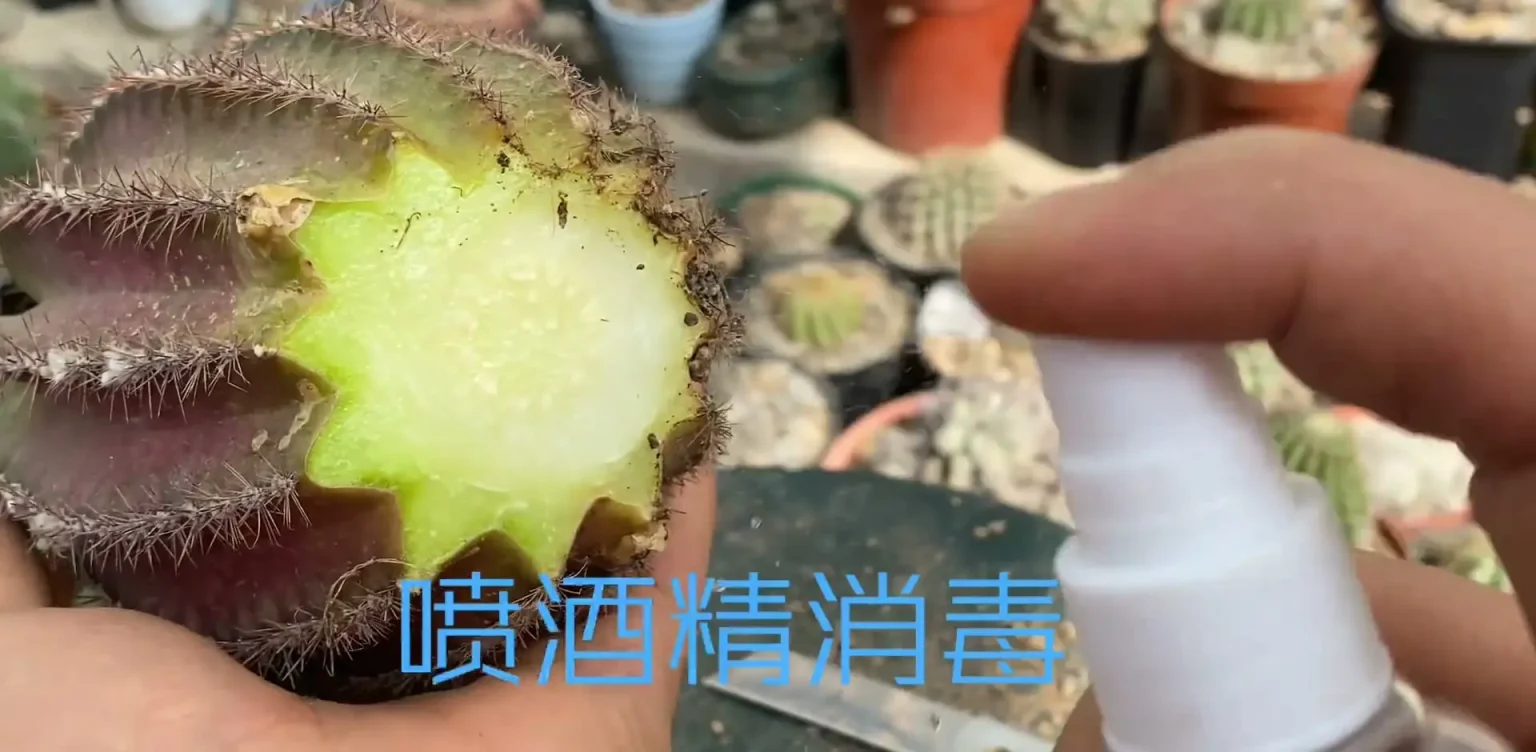
Now comes the slow part, and rushing it is how rot gets a second chance.
Step 8: Dry the wound until it’s hard. Lay the plant on its side on a table, bare-rooted, with any roots spread out so air reaches them. Bright shade is the safe default, especially for a windowsill plant, because strong sun scorches a stem that isn’t accustomed to it.
A tough outdoor plant already hardened to full sun can lie in direct sun instead, which dries the surface and seals it with a new protective skin. A rootless plant can’t replace lost moisture, so I’d only try that on a mild day, and I’d move it into shade at the first sign of yellowing.
Go by appearance, not the calendar. The wound should turn dry and brown and feel hard. Allow a few days for a slim stem and a week or more for a fat column. Humidity on my roof stretches that out in the damp months, and a dry climate may shorten it.
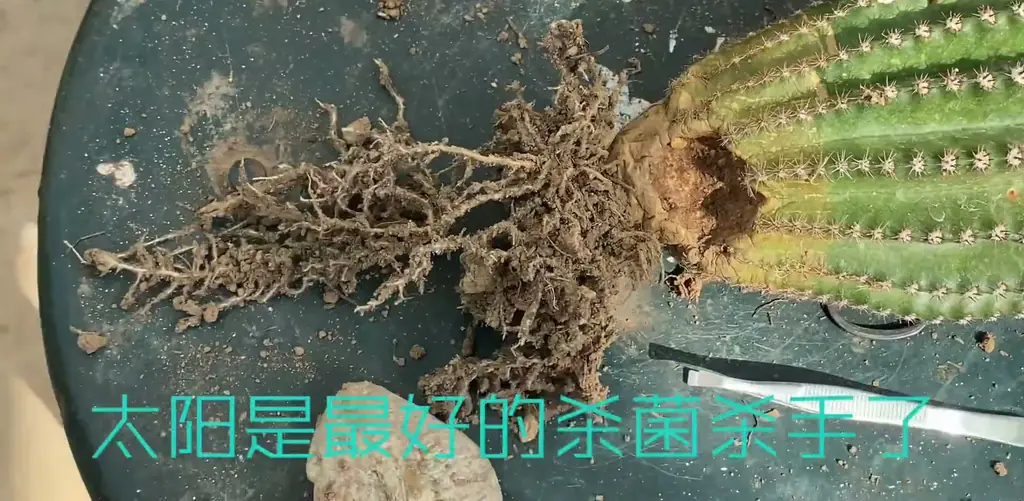
Once the wound has sealed, the plant is ready for soil, and how you position it in the pot matters.
Step 9: Replant with the wound above the soil. Hold the stem upright in the clean pot and fill dry mix in around the roots, stopping below the wound. A hole or scraped patch has to stay in open air, even if that means the plant sits a little high. A plant with no roots remaining is the exception: stand its dried cut end on a layer of mix and fill in around it, because new roots have to start there.
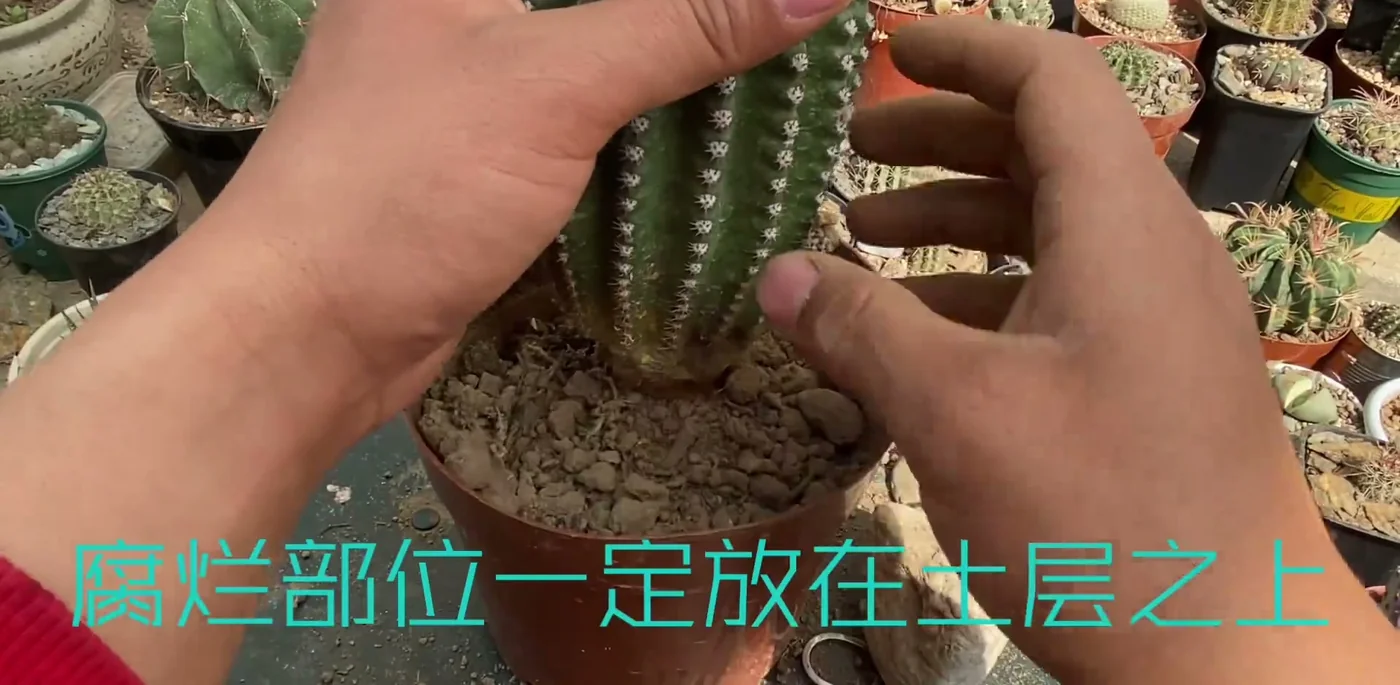
Planting high leaves a tall stem loose in the pot, and a wobbling plant can’t settle in.
Step 10: Prop the stem with stones. Set a few stones on the soil around the base, wedging them against the stem until it stops rocking. They hold the plant up without any extra mix going over the wound.
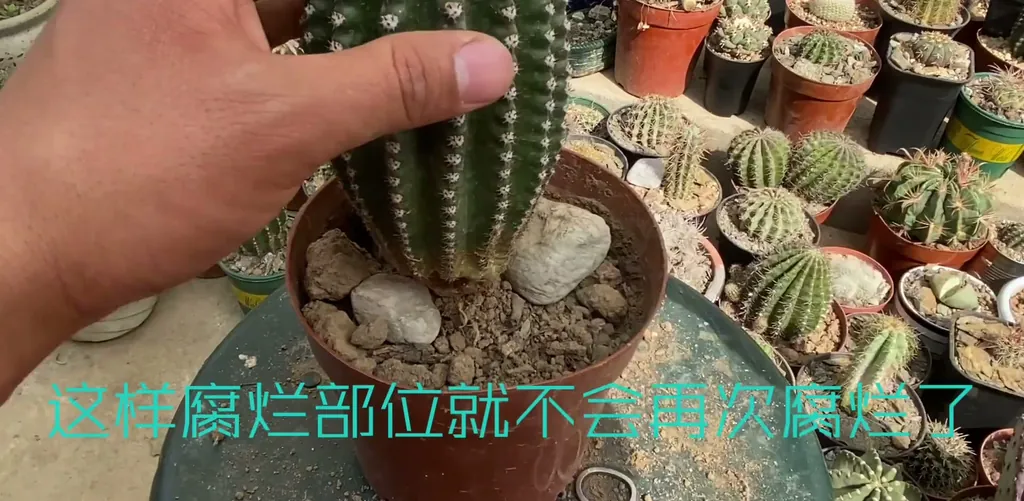
The hands-on part ends there, and the remainder is mostly leaving the pot alone.
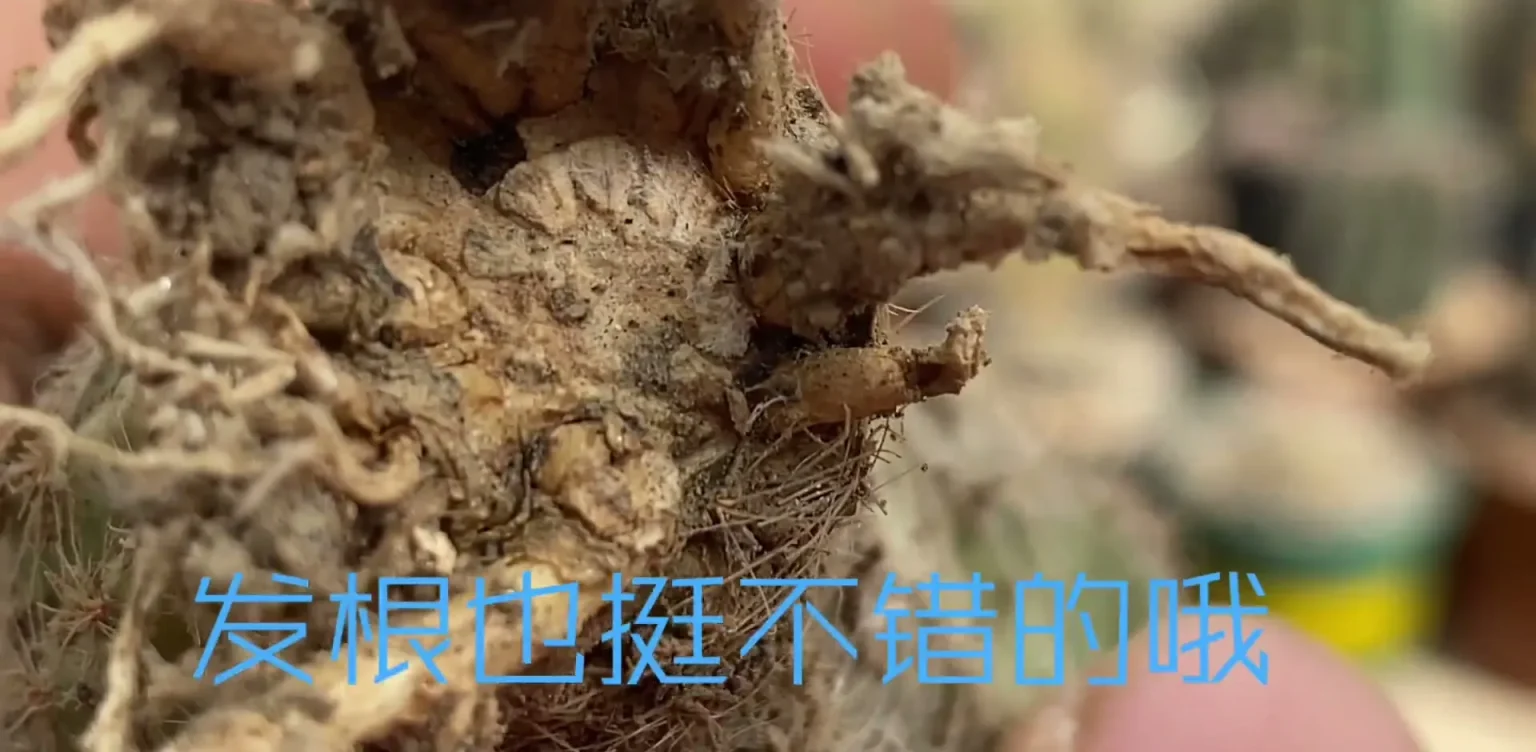
Step 11: Wait for new roots around the dried cut. Keep the pot still and don’t tug at the plant to test it. On a plant that lost its root end, new roots grow out around the old cut, which dries hard and stays visible in the middle. My columnar cuttings show roots in three to four weeks, and a stem weakened by rot can take longer, so give it that long before you lift it for a look.
Watering and light after cactus root rot treatment
Water is the thing most likely to undo the rescue, so the first weeks are about restraint. How long you wait depends on what the plant still has:
- Roots kept: wait about a week after replanting, and longer if you removed a lot of them. After that, go back to normal deep watering.
- No roots remaining: give the surface a little water with a narrow spout, keeping it off the stem, so the top of the mix is only slightly damp. Continue that until roots form.
- Light: keep the pot in bright, indirect light with moving air, then bring it back to its sunny spot gradually once it’s growing.
- Rain: keep it under cover. On my roof a recovering plant stays out of the summer downpours until it’s rooted firmly.
- Old mix: throw it out. Scrub the old pot before you use it again, and spray your tools with alcohol.
Press the wound and the base every week or so. Hard and dry is what you want. If a new soft patch appears, take the plant out and go back to Step 5 or Step 6, cutting higher this time.
The rescues I’ve lost mostly went wrong the same way: I left a little brown behind because I didn’t want to cut more, and the rot simply carried on. These days I take the extra slice. My repotting walkthrough goes through aftercare in more detail, along with choosing the right pot size.
Why cactus root rot starts, and how to stop it coming back
Cactus root rot starts when roots sit wet for longer than they can stand, so a rescue only lasts if you change whatever kept them wet. These are the usual causes:
- Mix that holds water. If the soil’s still damp a week after watering, it has too little grit in it.
- Small, frequent sips. Little top-ups mean the mix around the roots never gets the chance to dry.
- Rain. Summer heat in Huizhou doesn’t bother my desert cacti, but the downpours rot them.
- A nursery peat plug. Peat left around the root ball holds water long after the surrounding grit has dried, and it gradually smothers the roots.
- Wet soil on fresh wounds. Damaged roots that go straight into damp mix give rot an easy way in, which is why I always repot into dry mix.
Most of that comes down to one habit, which is letting the mix dry out completely between drinks. Seasonal timing and the checks I run on a pot before reaching for the can are all in how to water a cactus.
Cactus root rot questions
Can a cactus survive without roots? Yes. A cactus stores water in its stem, so it can sit rootless while a dried cut grows new roots. The column in Step 11 lost its old root end and went on to root well, but only because the flesh above the cut was clean.
Why is my cactus brown at the bottom? Press it. Firm, tan, bark-like skin is corking, which is normal on older plants. If the discolored area is soft, sunken or black, it’s rot and the plant needs to come out of the pot.
Will a cactus grow back if I cut the top off? Usually, as long as both halves are clean. The top can root as a cutting, and a healthy stump can push new buds from its sides. A stump with soft tissue in it won’t do either, so don’t count on it.
Can root rot spread to my other cacti? I treat it as if it can. I never reuse the soil, and I disinfect my tools between plants. Containers sharing a saucer or tray are worth examining too, because they often share the same wet conditions.
Do I need sulfur, cinnamon or fungicide? They aren’t part of my routine. Many growers dust a cut with sulfur or cinnamon to help it dry, and I honestly don’t know how much that adds to alcohol and a thorough drying period. If the rot’s completely out and the wound is hard, I don’t reach for anything else.
Other succulents rot in much the same way, though the treatment changes from plant to plant. If your plant isn’t a cactus, the Succulent Primer home page leads to the guides for other succulents.